When we walked the River of Life route recently, we started at the trail head near the Midvalley Megamall and stopped at Chinatown, because we wanted to have a look at the murals there. Click here for a detailed report. So we skipped the part from Chinatown to Masjid Jamek, considered the be the most beautiful part of the route.
As there are LRT stations both at Masjid Jamek and near Midvalley (Abdullah Hukum) , I suggested to Paul that we could walk another time, one way, from Masjid Jamek and going back by train.
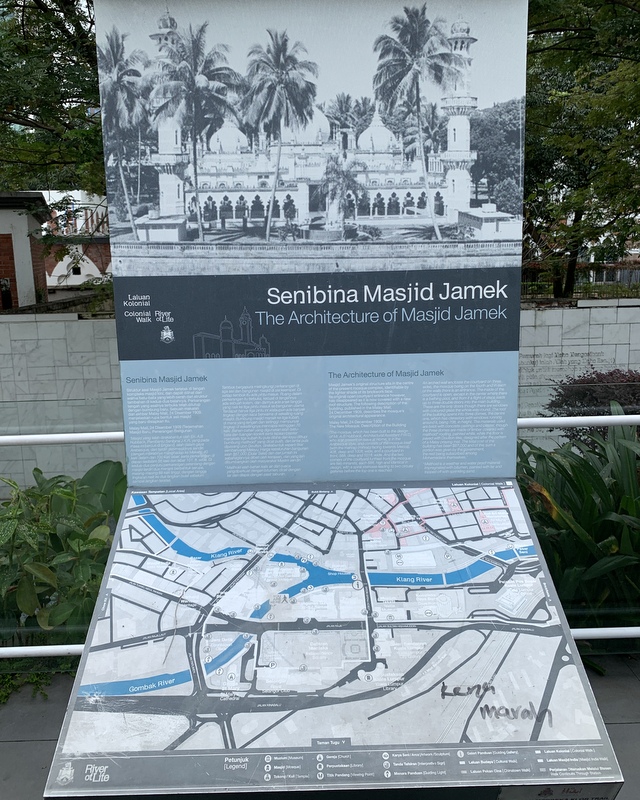
We met at the exit of the Masjid Jamek LRT station and started our walk from there. A clear signboard gives information about the River of Life project.
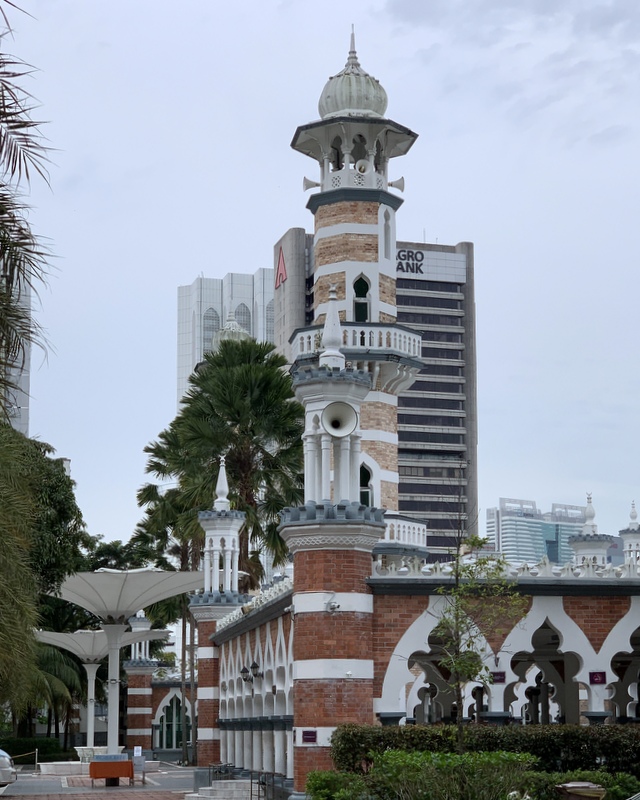
Our walk started in front of the Masjid Jamek, one of the masterworks of Arthur Benison Hubback, built in 1909. Non-Muslims can visit the mosque, but there is a dress code. Left an explanatory signboard, right the mosque as seen from the main entrance.
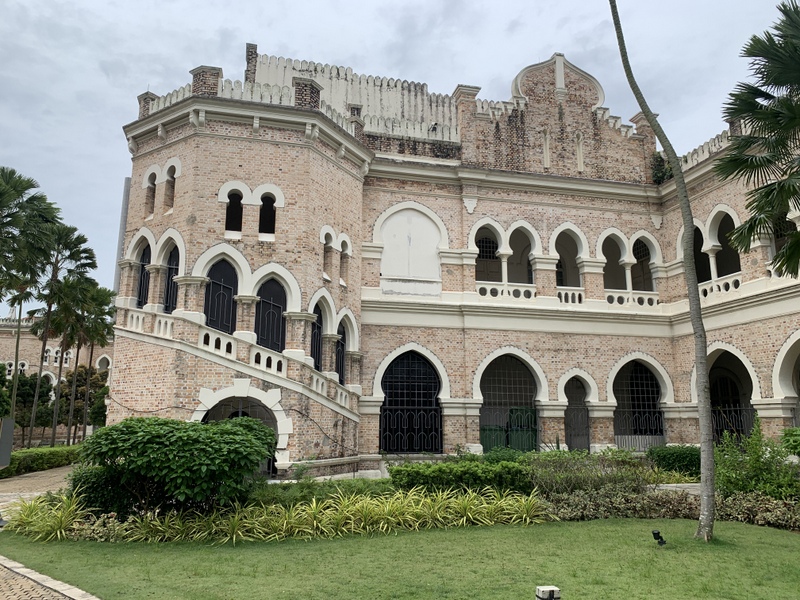
The route passes the magnificent (old) Supreme Court building, another creation of Hubback (1915). Not in use at the moment and the interior needs urgent repairs. The picture has been taken from the new pedestrian bridge crossing the Gombak river. In the right picture Paul is looking at the mosque, located at the confluence of the Gombak and Klang rivers.
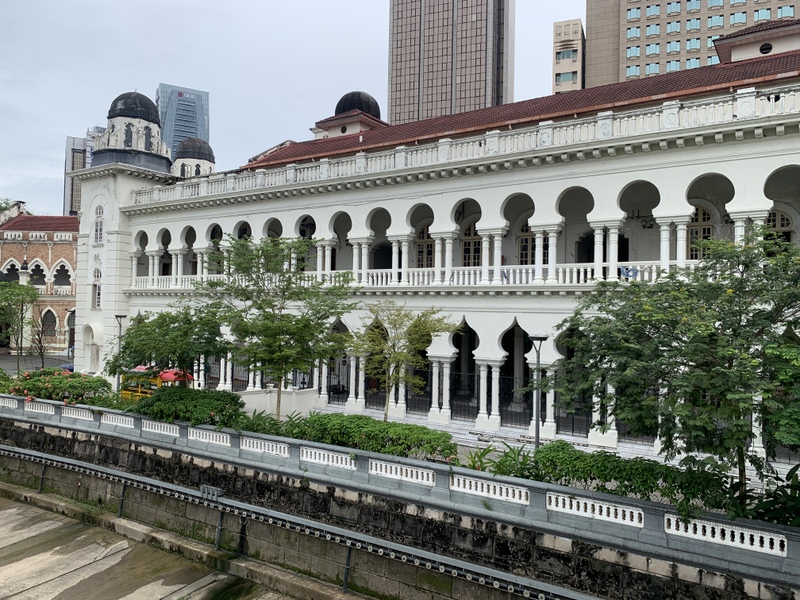
The next few hundred meters are for me the highlight of the River of Life project You pass the back of the former Government Office (1897). The front side, facing Dataran Merdeka, is probably the most photographed building of KL The tranquil , peaceful backside was an unexpected surprise for me
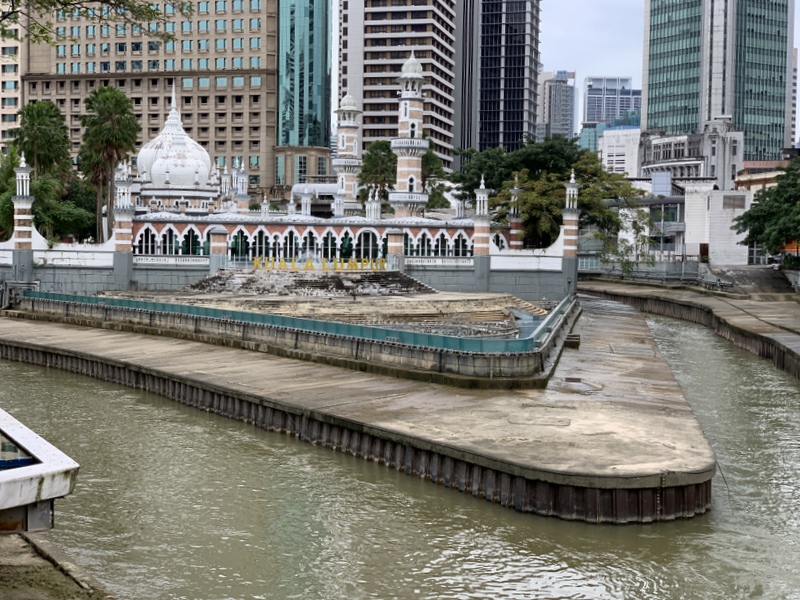
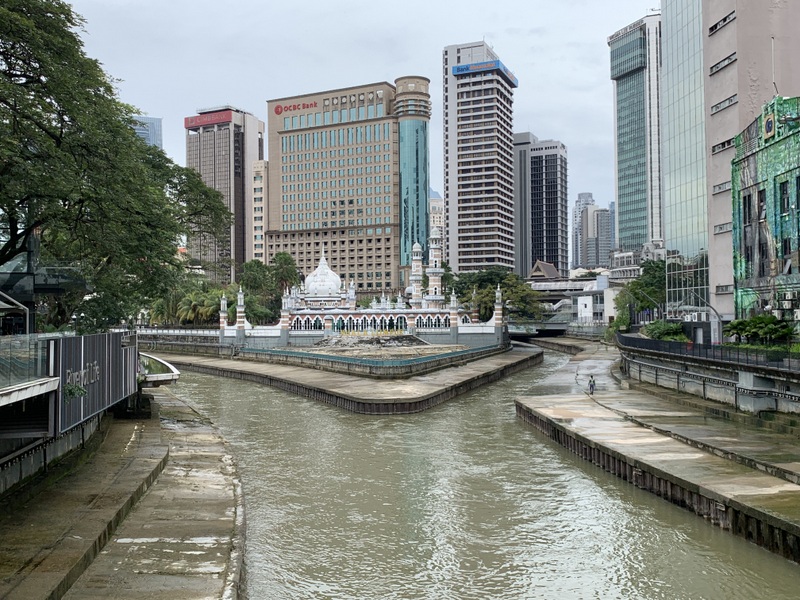
Continuing along the Gombak river, you have nice views of the Mosque and the confluence of the two rivers.
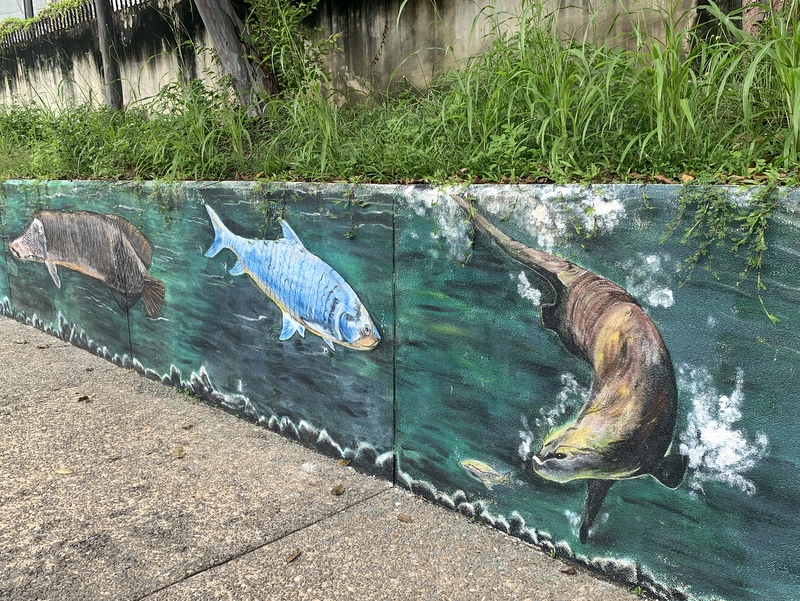
Before you reach the next bridge, there is interesting mural art. These three buildings are still in use, as can be concluded from the numerous aircon’s .
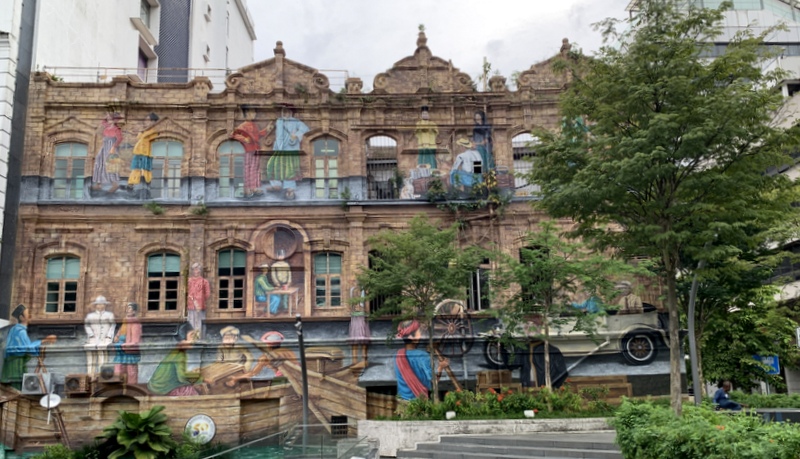
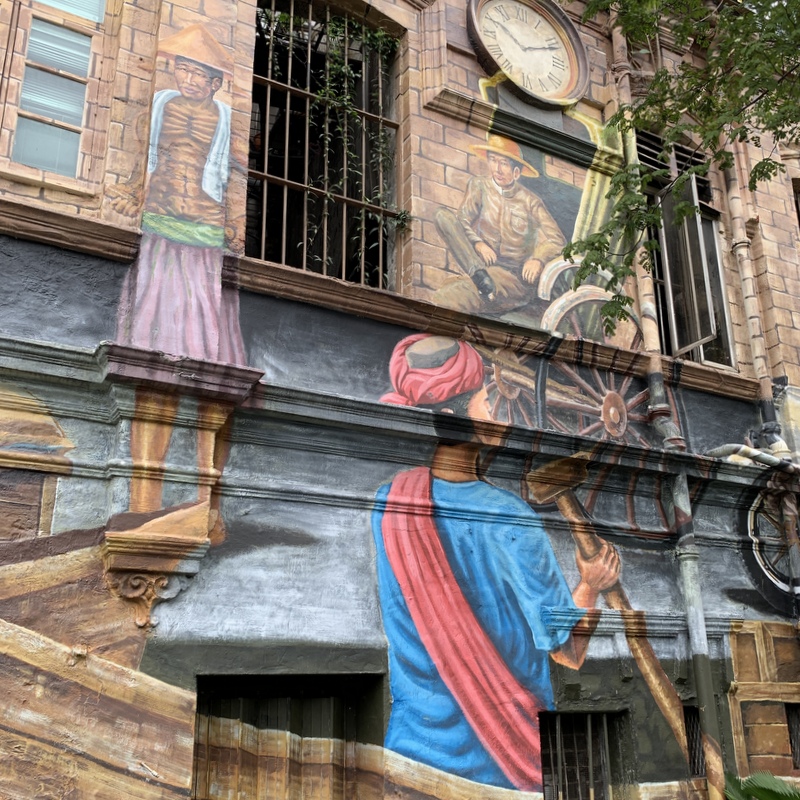
Almost next to it, this building looks vacated, not a good sign . The façade has been used to paint various sketches of Kuala Lumpur’s past
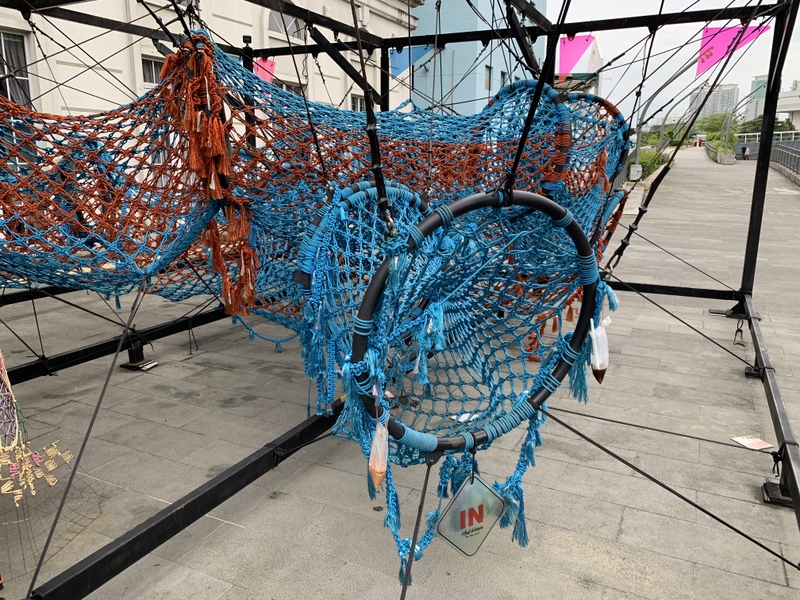
It looks like after the bridge you can continue at the same side of the river, but soon, the raod is blocked (left pic), so you have to cross the bridge here, where you can find a modern work of art. (right pic)
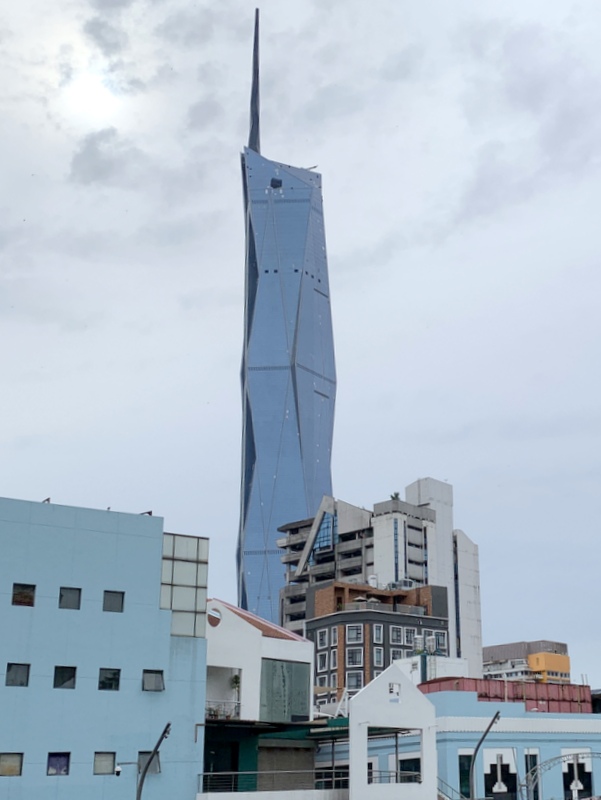
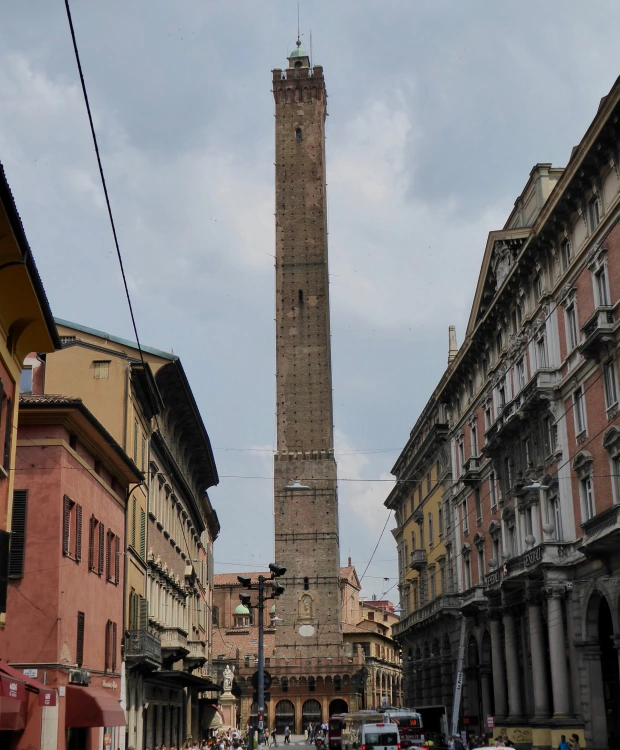
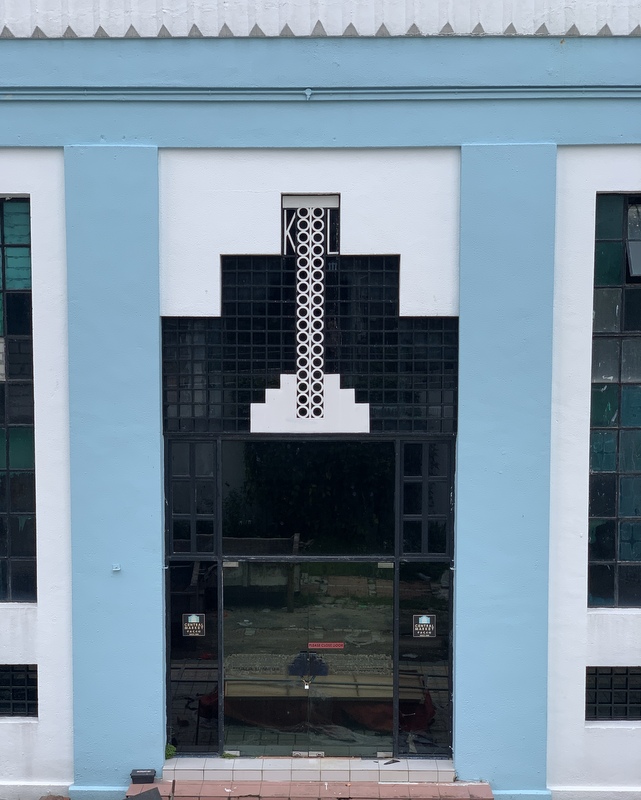
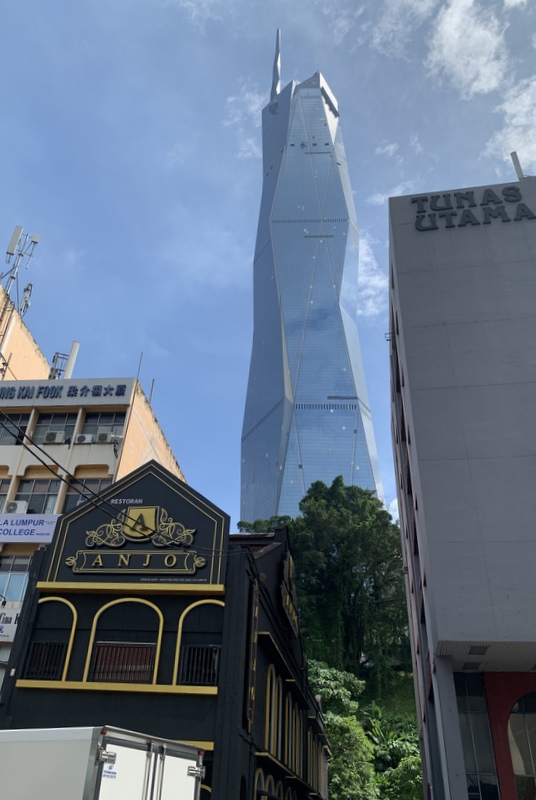
You will pass now the Central market (Art Deco , 1937). The left picture shows a part of its façade, with towering above it the new Merdeka 118 skyscraper, still under construction. It will become the second-tallest skyscraper in the world. I can’t resist the temptation to digress for a while. When I see a photo like this I immediately have the association with a phallic symbol and that these symbols have been constructed since time immemorial. The right pic shows the Asinelli tower in Bologna, built in 1107 😉 .
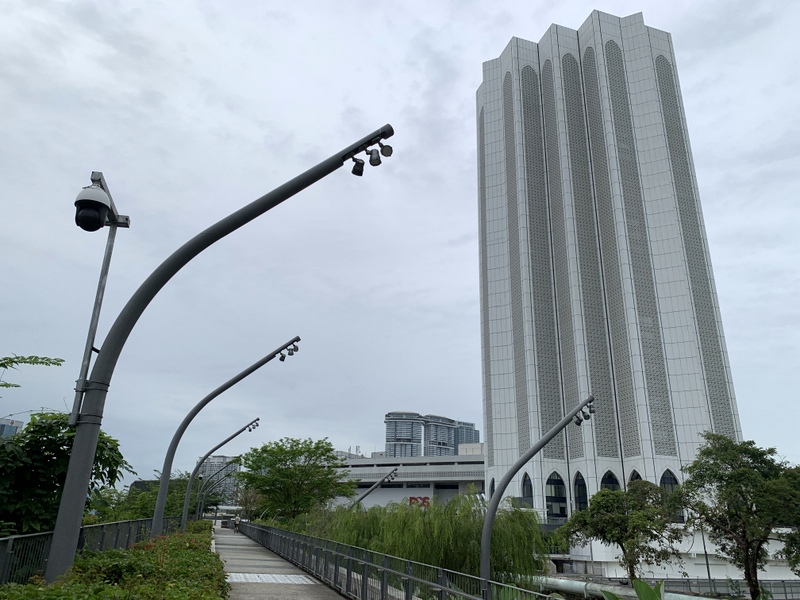
Left a detail of the Central Market and right one of my favourite buildings in KL, the Dayabumi building. Completed in 1984 and for one year the tallest skyscraper of Malaysia. For me it is a fine example of Islamic Architecture.
Passing the Dayabumi complex (left) we reach the Pasar Seni LRT station (right in the center), where we cross again the river.
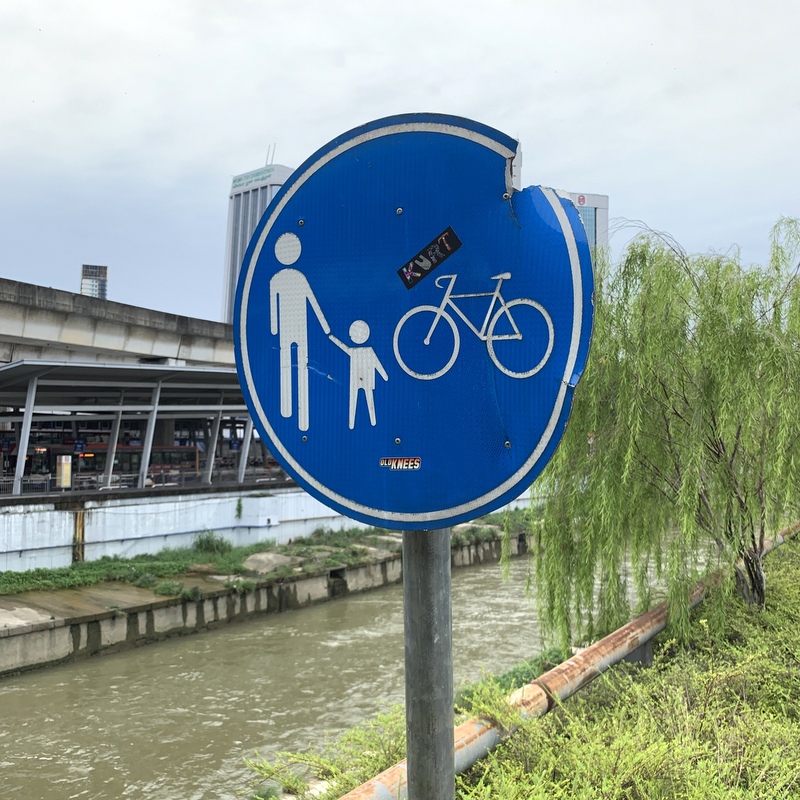
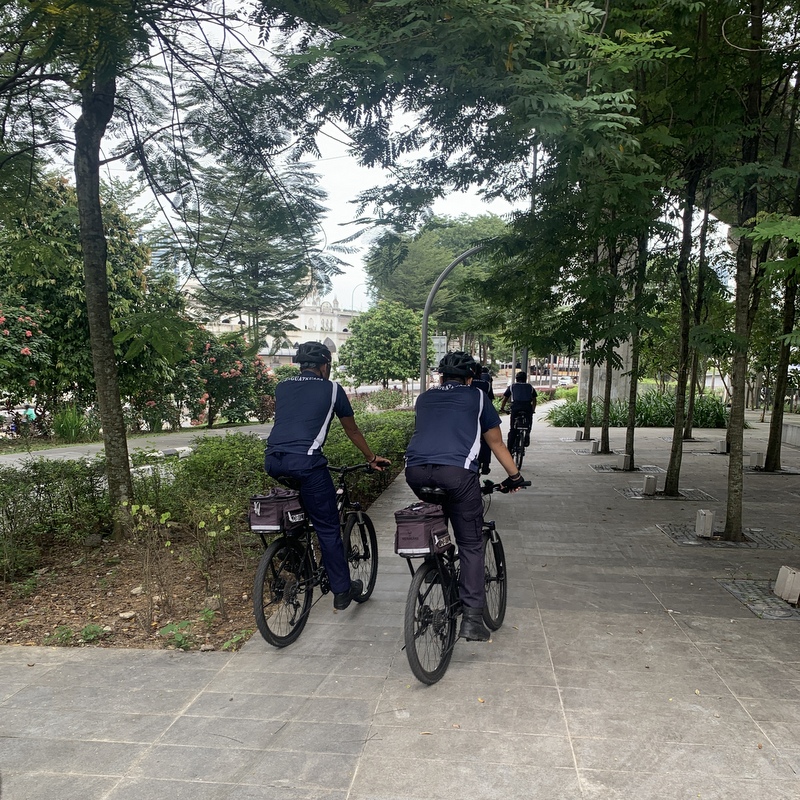
From there we followed the same route as during our first trip, so not many photos. It is basically a bicycle lane and we noticed a few cyclists.
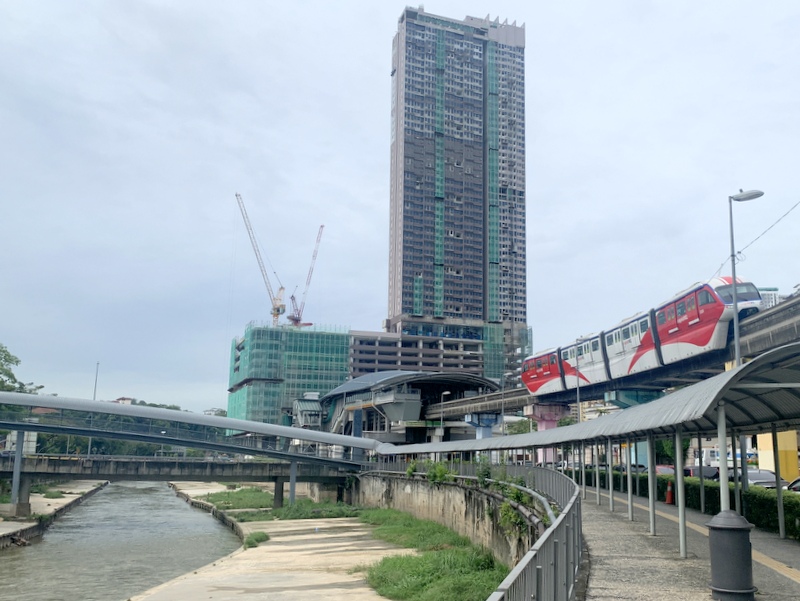
Mural art (left) and the Tun Sambanthan monorail station in Brickfields (right)
This time we decided to cross a bridge and continue at the other side of the river, so we didn’t walk through Brickfields. Distance is a bit shorter, but it is not interesting at all.
And there is one part where you have to walk a few meter away from busy, noisy highway traffic. Really to be avoided.
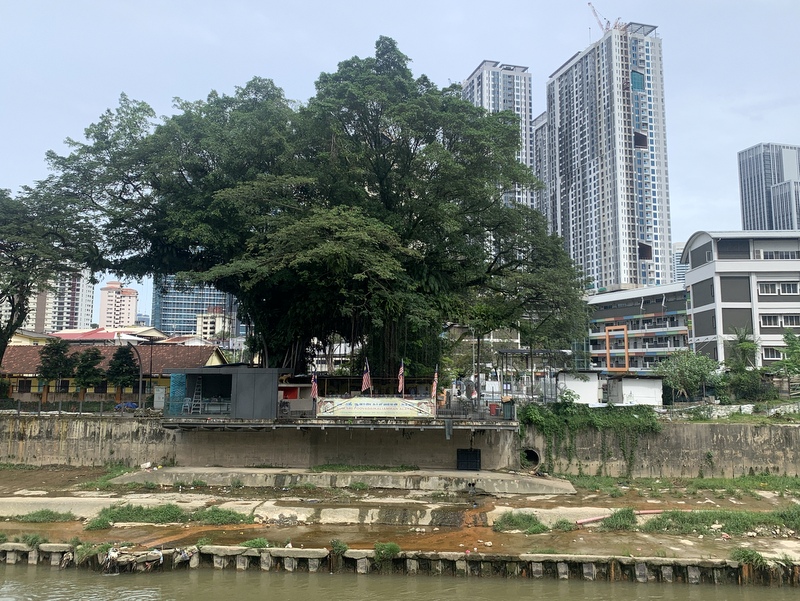
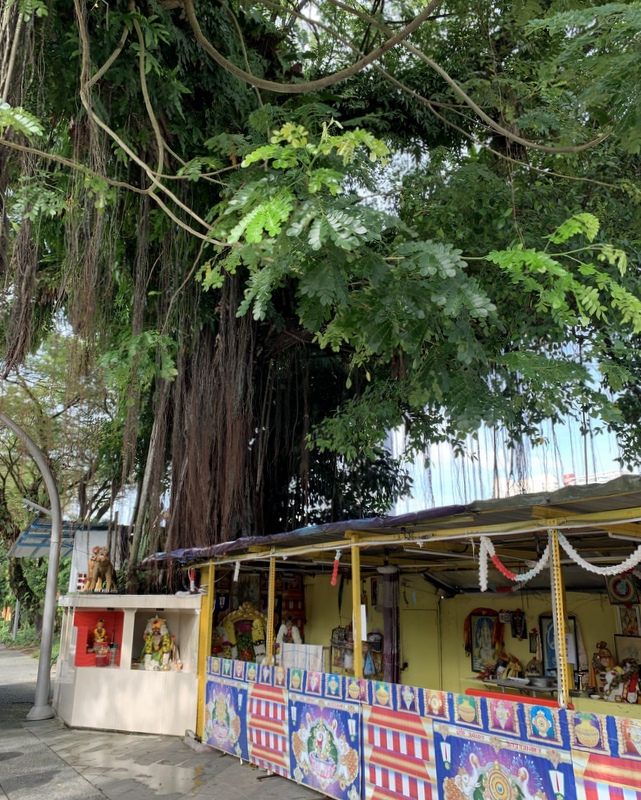
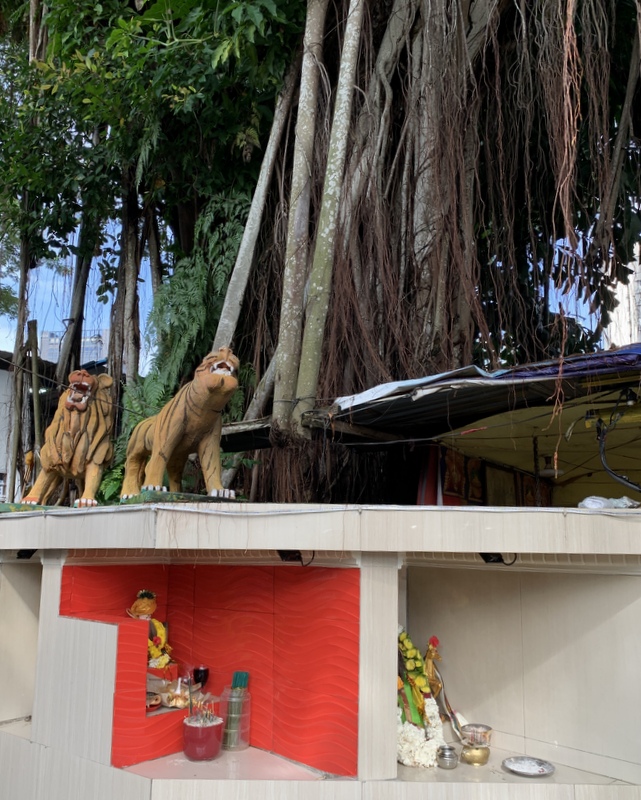
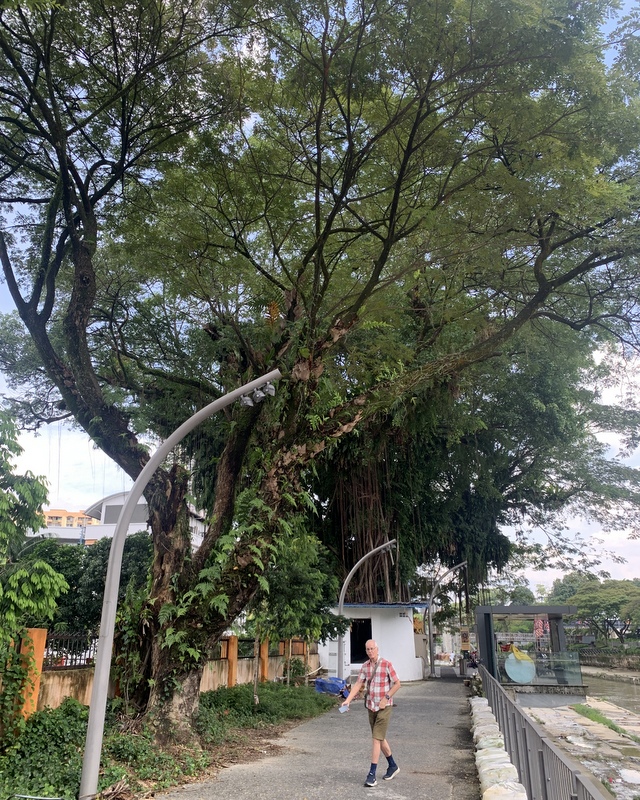
The Kalaimman temple is at the other side of the river. The majestic tree is now even more impressive
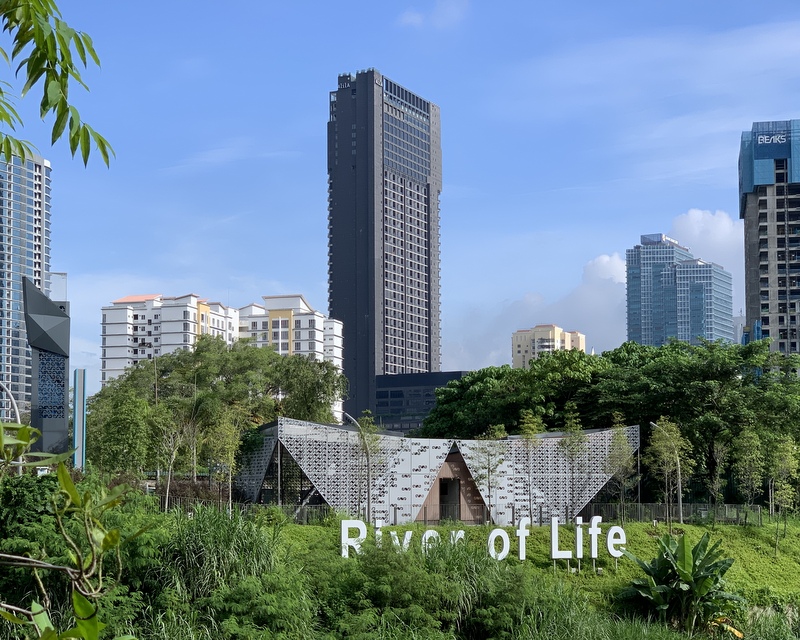
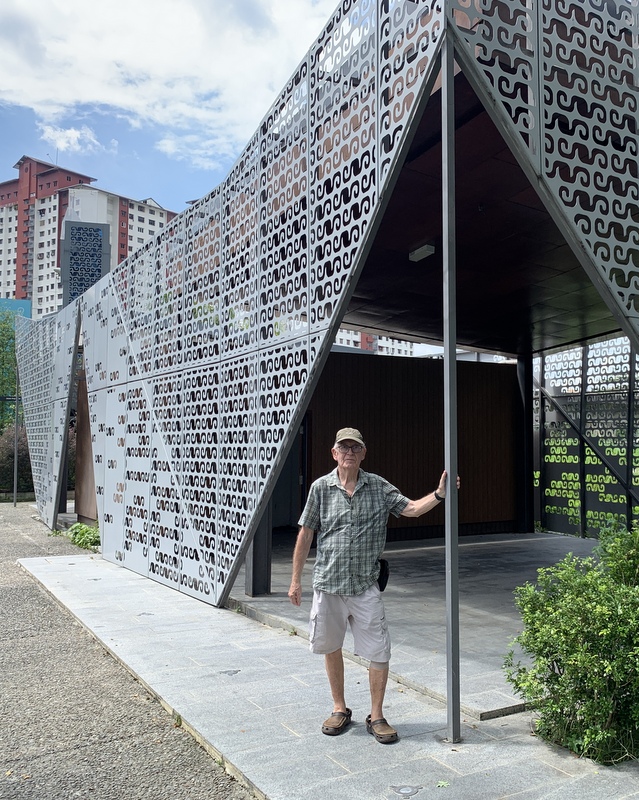
As soon as possible we crossed back to the other side of the river, and continued the trail until where we had started during our first trip. There was a sign near the building that it is the Southern Gallery. Completely empty, maybe there are plans to put some exhibits inside.
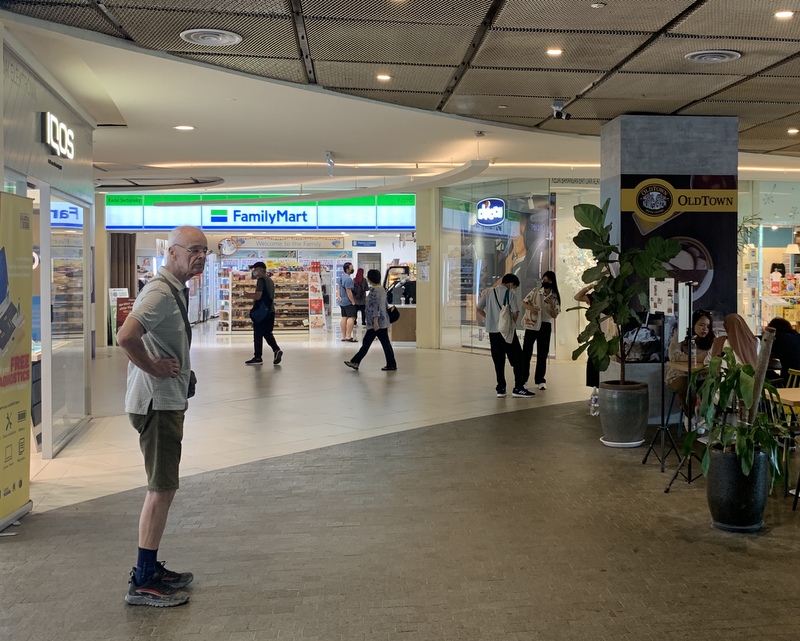
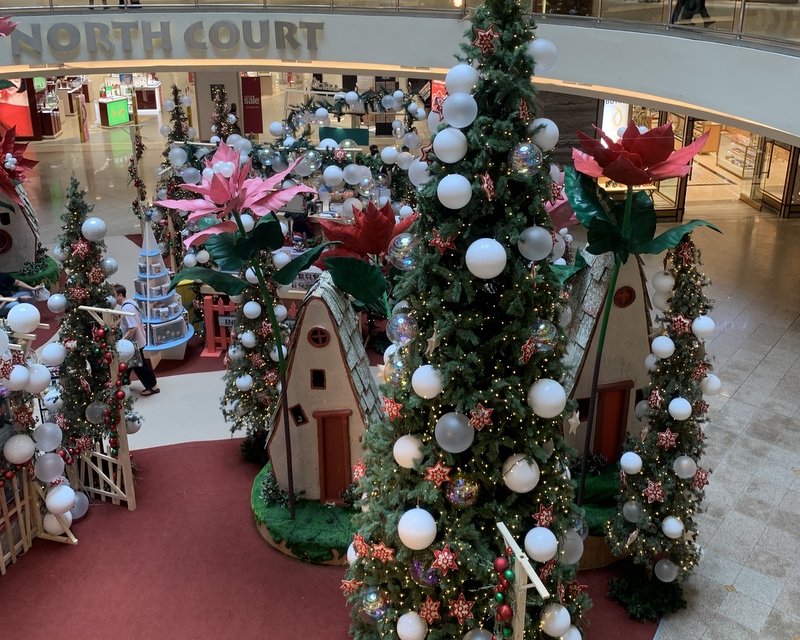
To reach the Abdullah Hukum LRT station we had to cross the Midvalley complex, where you can get easily get lost. Christmas atmosphere.
To reach the station we had to cross once more the Klang river.
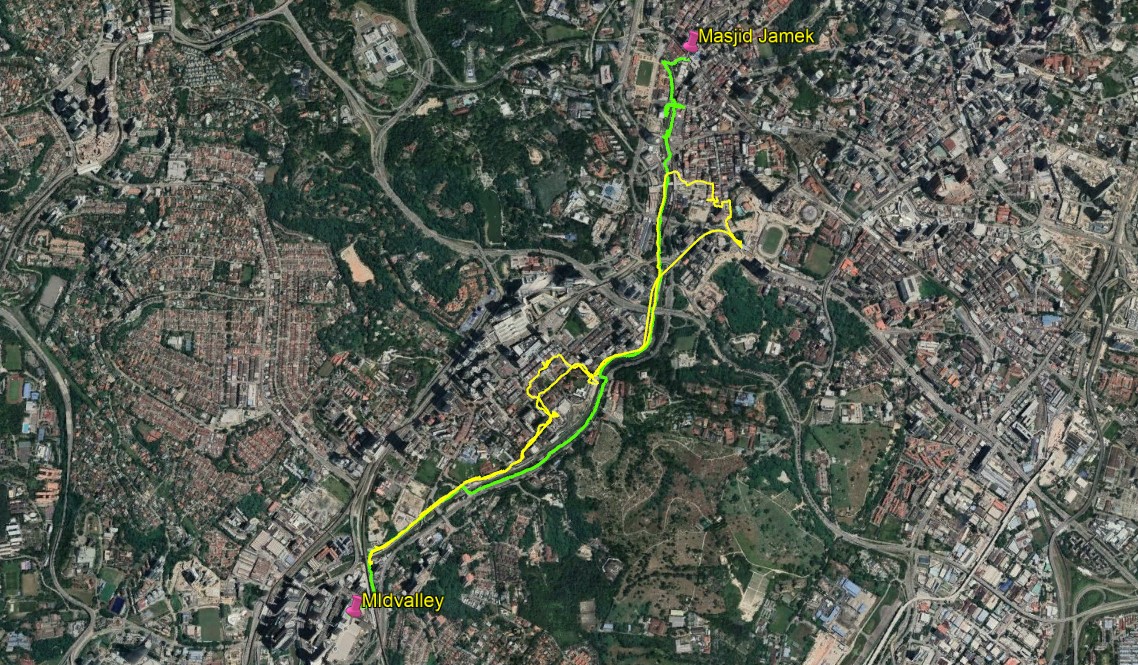
Here is a Google Earth map of our walk, in green. For comparison also the route of the first trip is shown (in yellow) . Notice the part where we walked at the other side of the river, avoiding Brickfields. To be avoided at all costs, Brickfields is much more interesting,
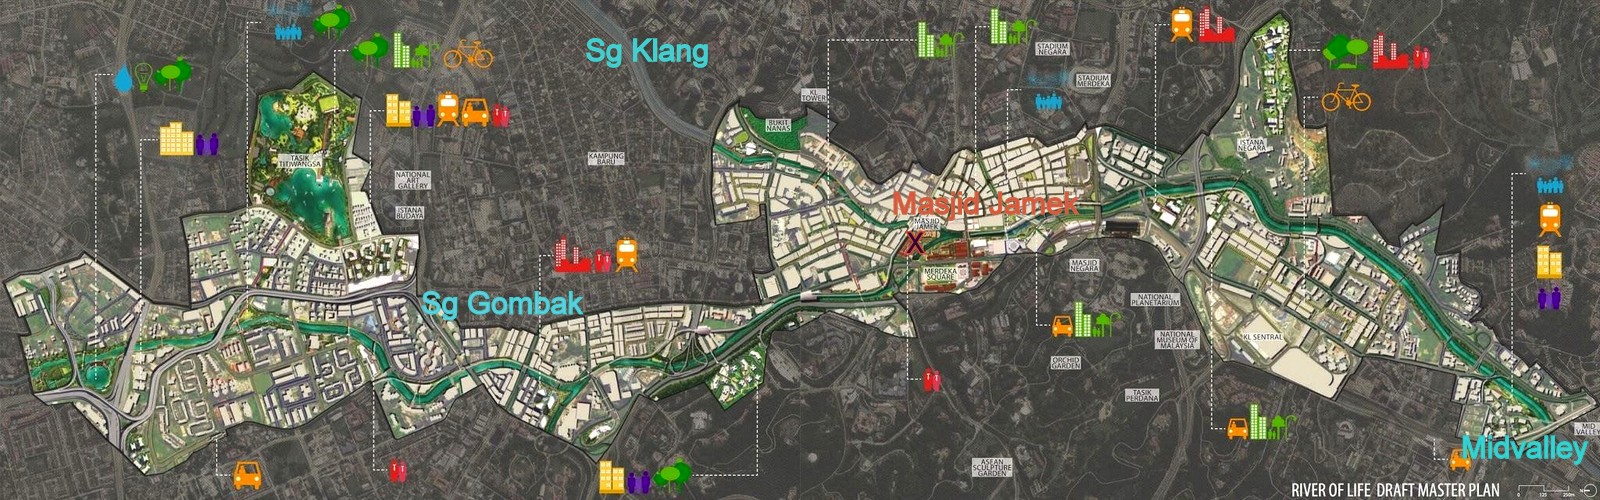
The River of Life (ROL) project was launched in 2011 and aimed at reviving the Klang River and Gombak River within the city of Kuala Lumpur, transforming the banks into waterfront areas with economic , touristic and commercial value through river cleaning and beautification. An ambitious project, here is the masterplan. Click to enlarge. I have put a few markers,the Klang en Gombak rivers, the Friday Mosque , where their confluence is and to the right Midvalley where the City of Kuala Lumpur ends.
In 2017 the first phase of the project was officially opened, the region around the confluence of the two rivers and the historic city center. A pedestrian bridge has been built across the river from where you have a nice view of the Masjid Jamek, and the river banks are brightly lit at night. During the visit of my family in August we took pictures from the bridge. The Friday mosque in the centre, left the Gombak river, right the Klang river. Spectacular, but too blue in my opinion.
Another part of the project is a biking/hiking trail along the Klang river between Masjid Jamek and the Midvalley megamall. My friend Paul had walked this trail and was willing to show it to me. He suggested to start at the Midvalley side,
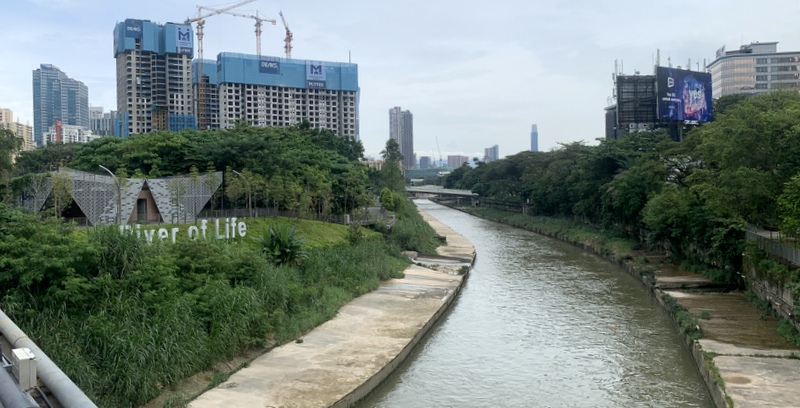
The start of the trail is marked on Google, close to Midvalley, but we needed Waze to find it, at the end of a minor dead end road (left picture). A signboard River of Life made it clear that we had reached the correct spot. The building behing the signboard looked nice but was unused.
The first part of the trail is very pleasant. It is very wide as it is meant primarily as a bicycle route. The right picture , looking back at the Midvalley complex, shows a group of cyclists
Along the route descriptive panels give information about the history of the Klang river.
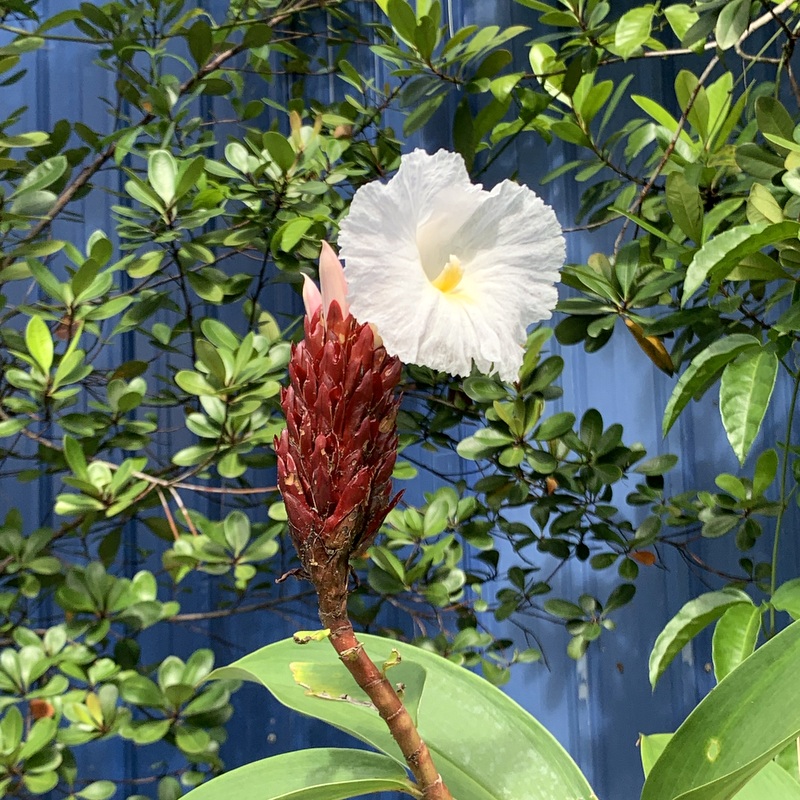
We passed building sites, still under construction. A nice sculpture with an unfinished building. A nice flower in front of a fence.
We could have crossed the white bridge in the background to the other side of the Klang river, but decided to follow the bicycle route.
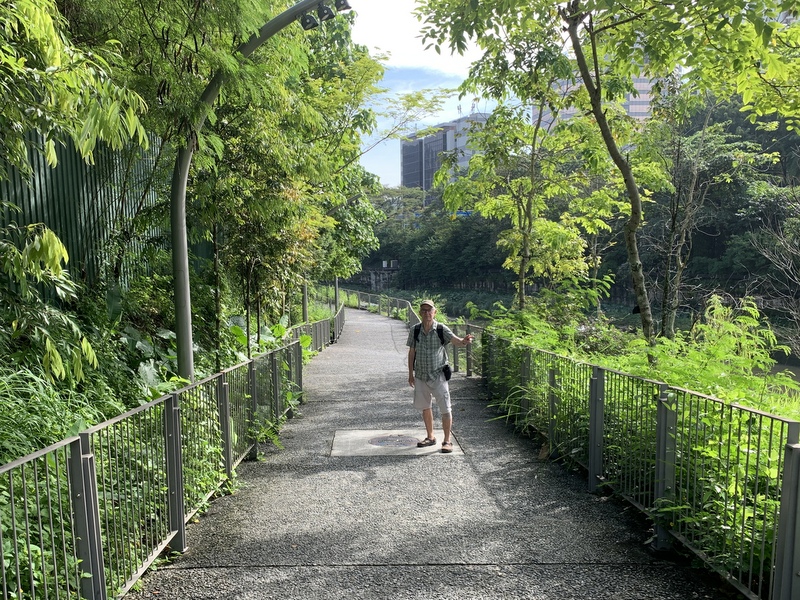
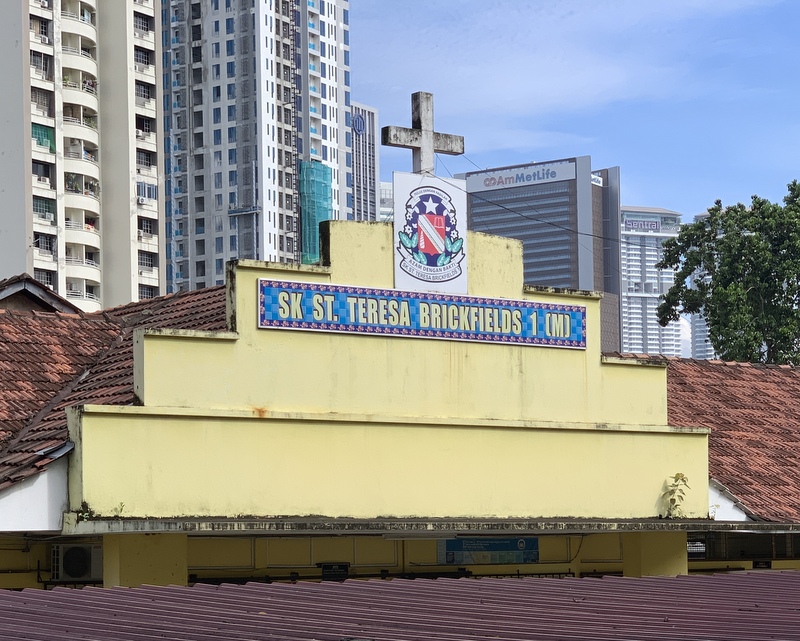
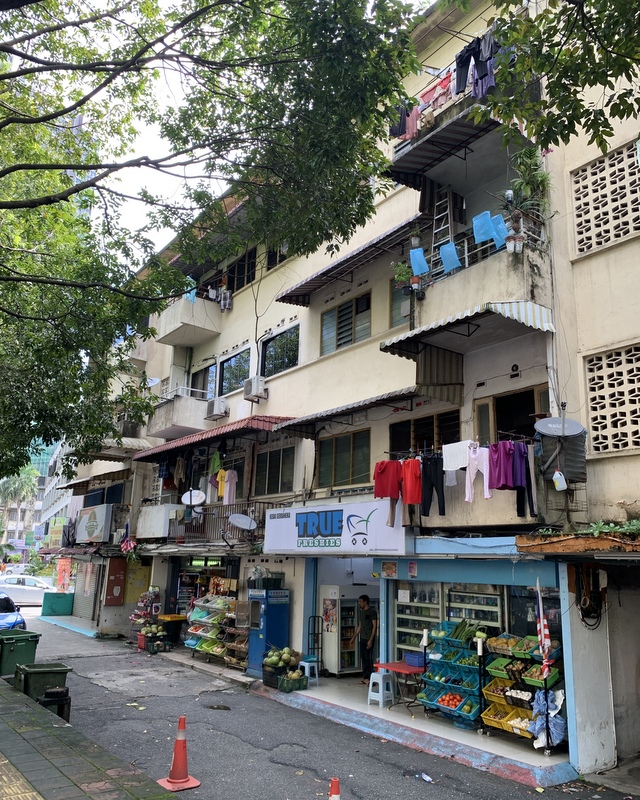
Entering Brickfields. Beautiful trees. We passed the St Teresa school.
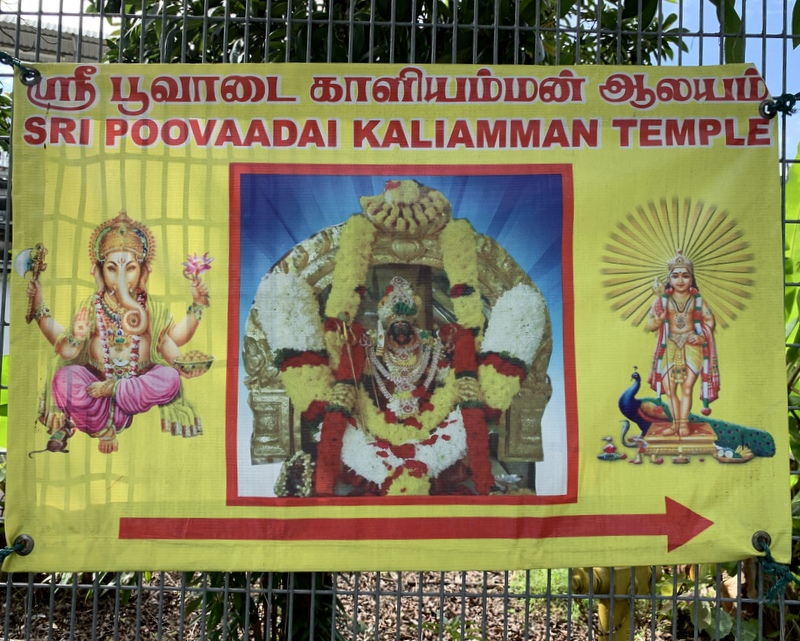
In the left picture above you can see a small white building. This is the Sri Poovaadai Kaliamman temple, built around a gigantic banyan tree. An interesting surprise.
After the temple it is not possible to walk along the river, but a blue bicycle ribbon leads you through Brickfields,
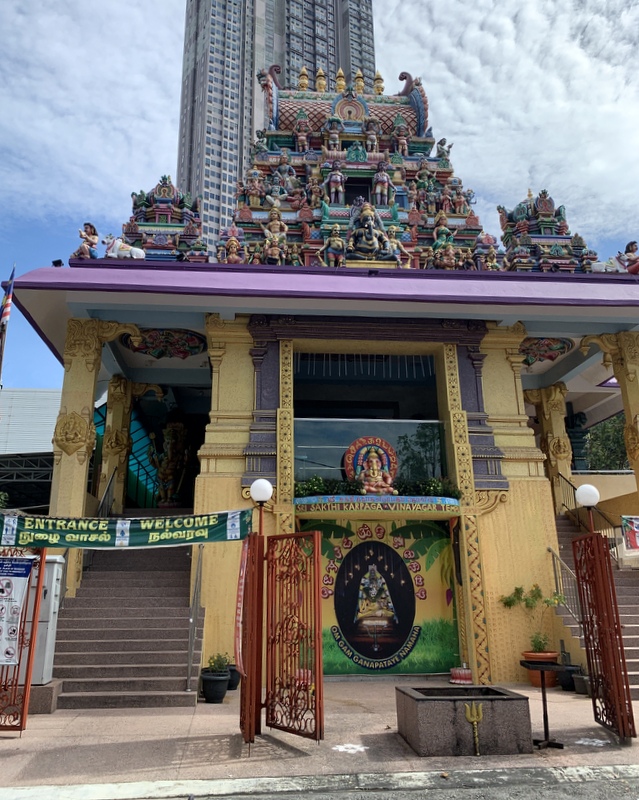
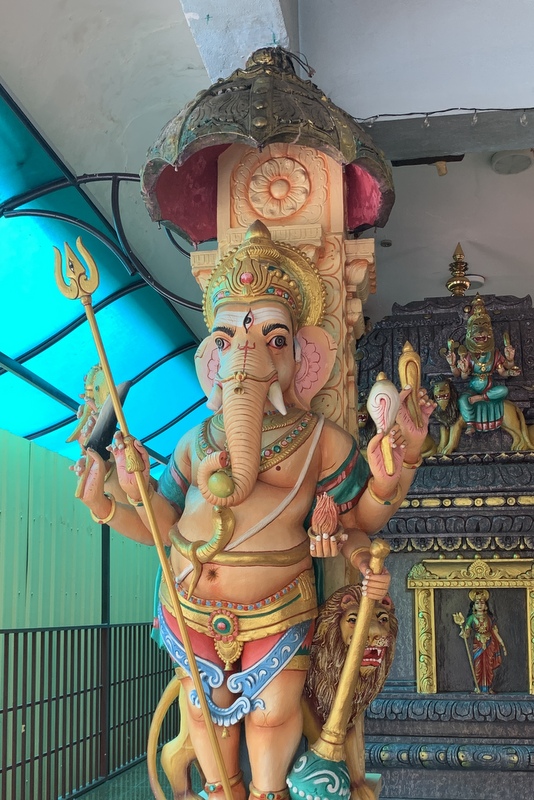
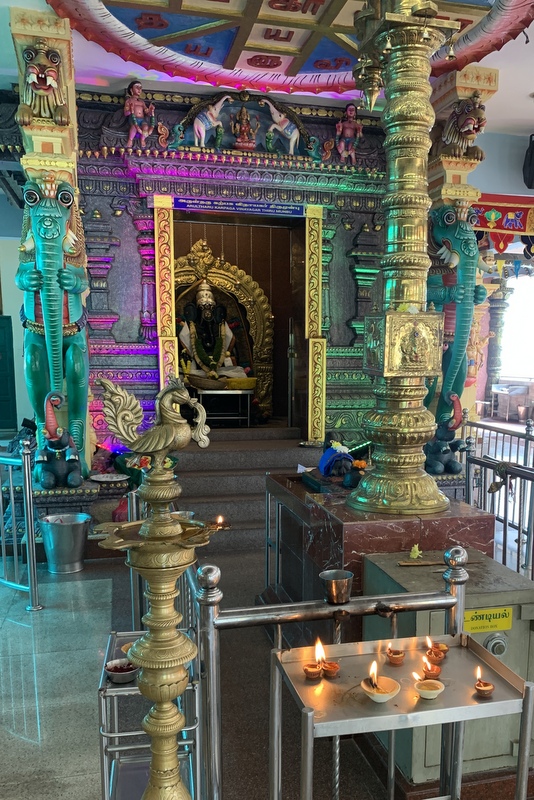
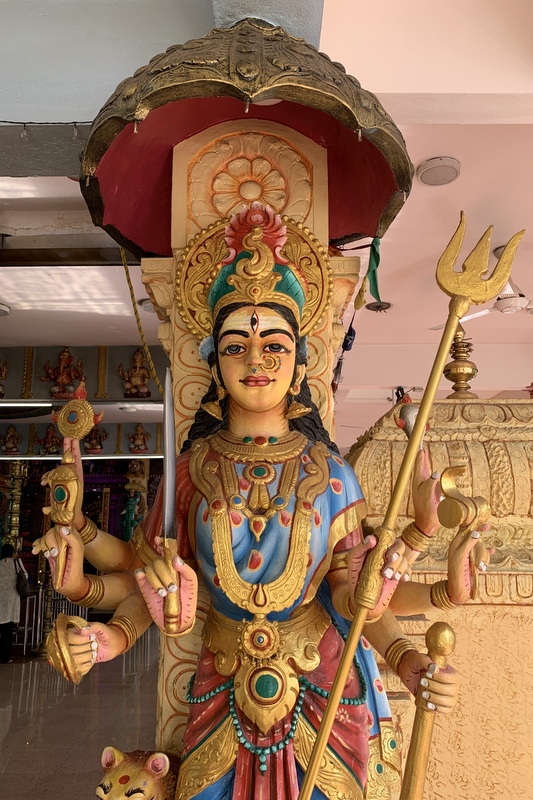
It is an interesting part of the walk, Brickfields is very Indian, We passed another temple, the popular Sri Sakthi Karpagar Vinayagar temple.
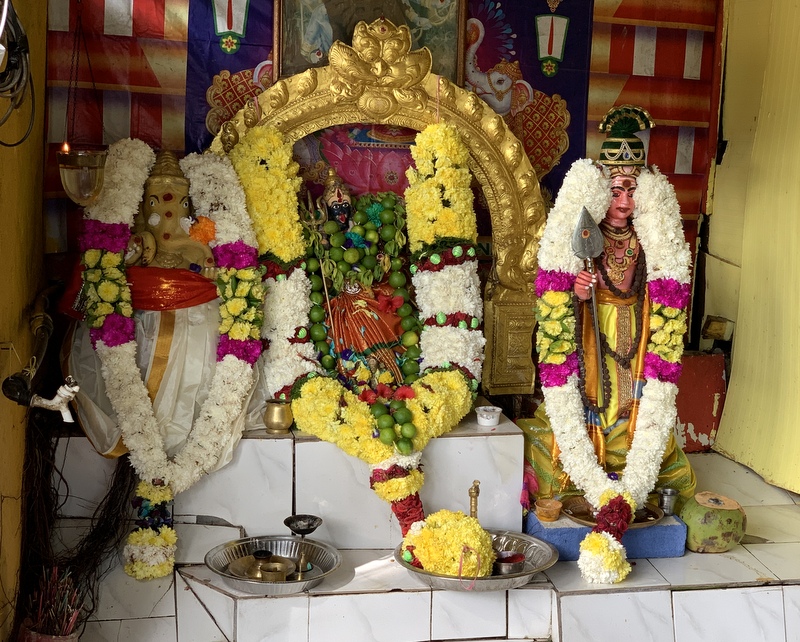
I walked around in the temple and took pictures.
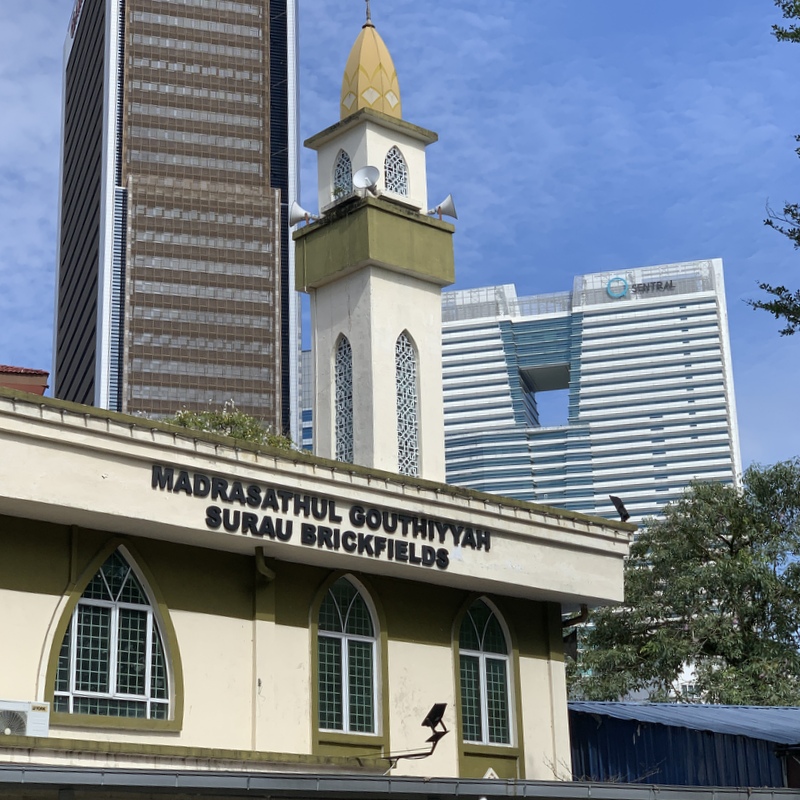
Left the Tamil Methodist Church (1908), right a Muslim Surau & Mosque. Brickfields is multi-religious 😉
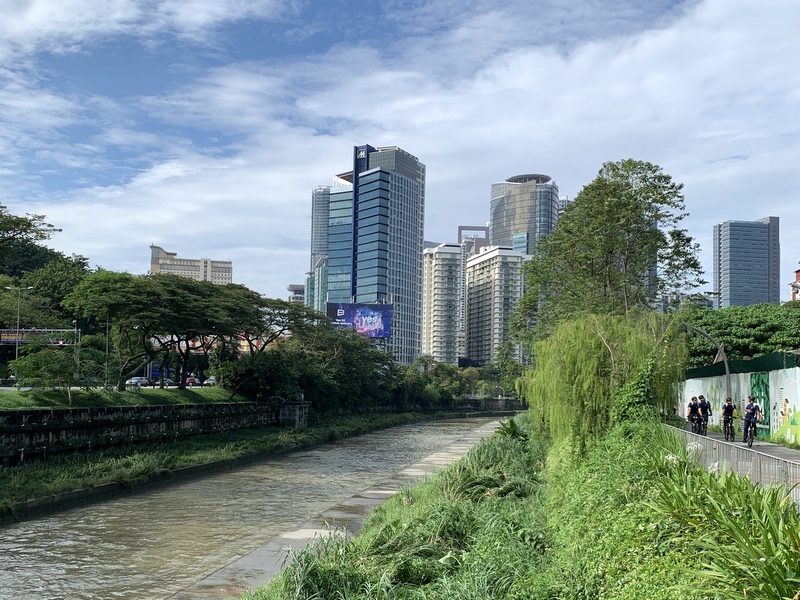
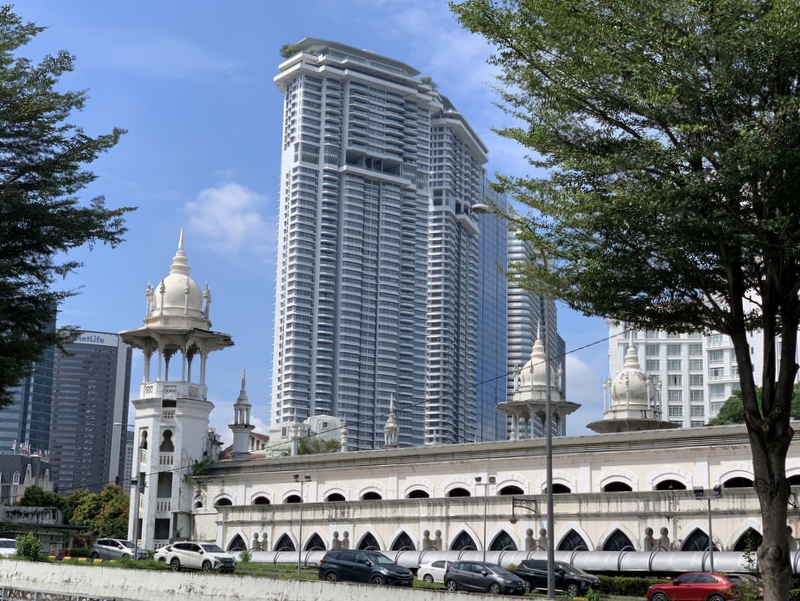
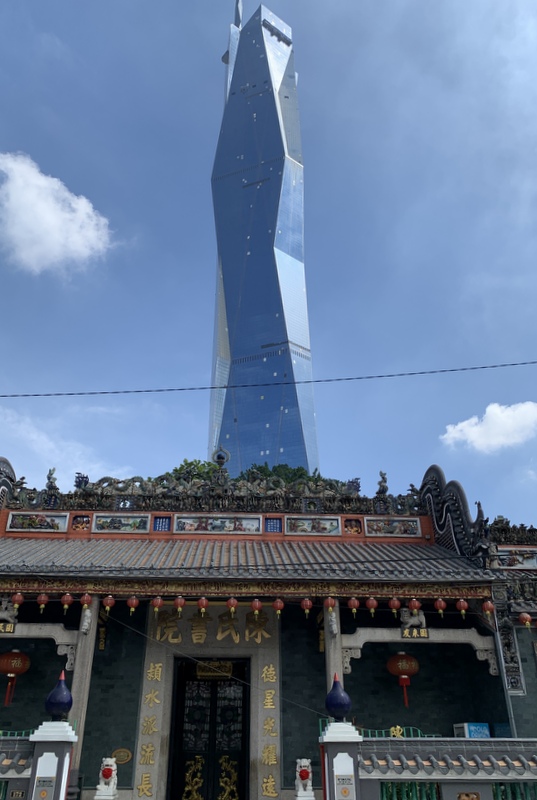
After passing through Brickfields the route joins again the Klang river. In the center the Merdeka 118 building, 679 meter tall, the second-tallest skyscraper in the world.
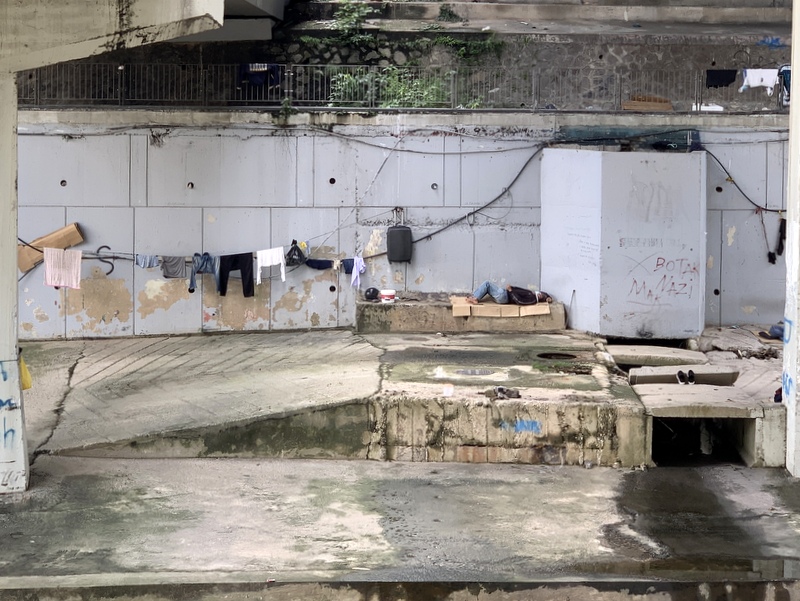
Murals along the route, at the other side of the river, a homeless person has hung his laundry to dry, and is taking a nap.
We passed the iconic Old Railway Station, a creation of Hubback (1917) and reached the underground MRT Pasar Seni station
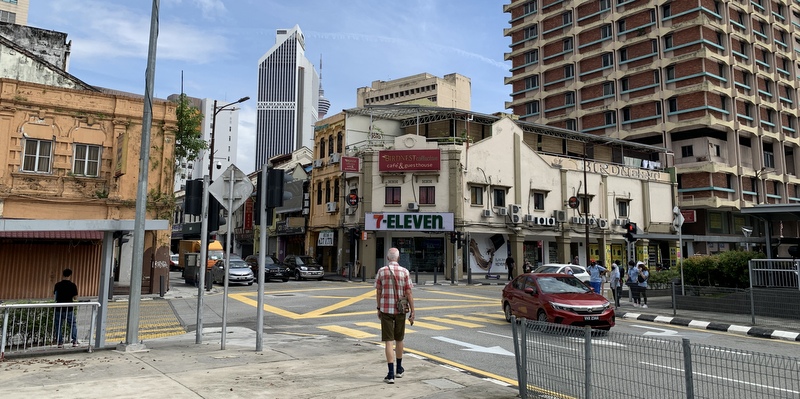
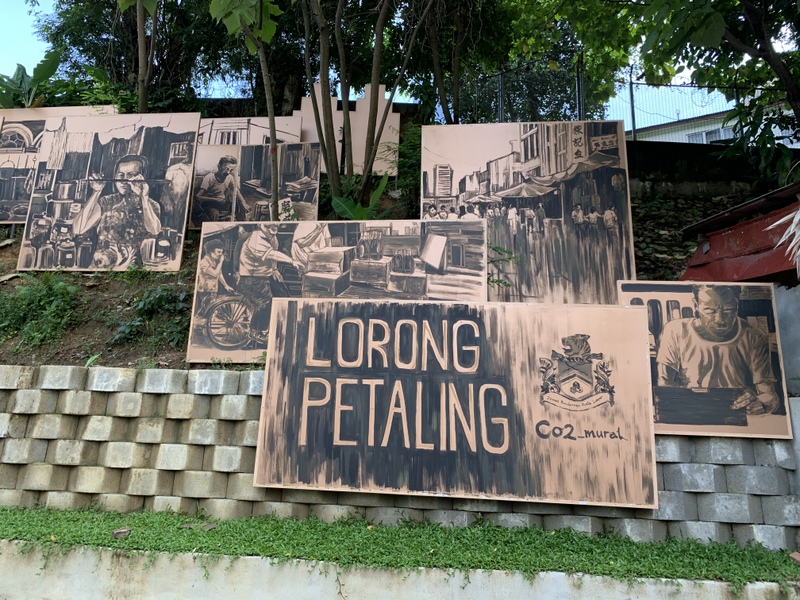
Here we decided to leave the last part of the route, to Masjid Jamek, for another walk and instead explored the KL murals in the region around Petaling street in Chinatown,
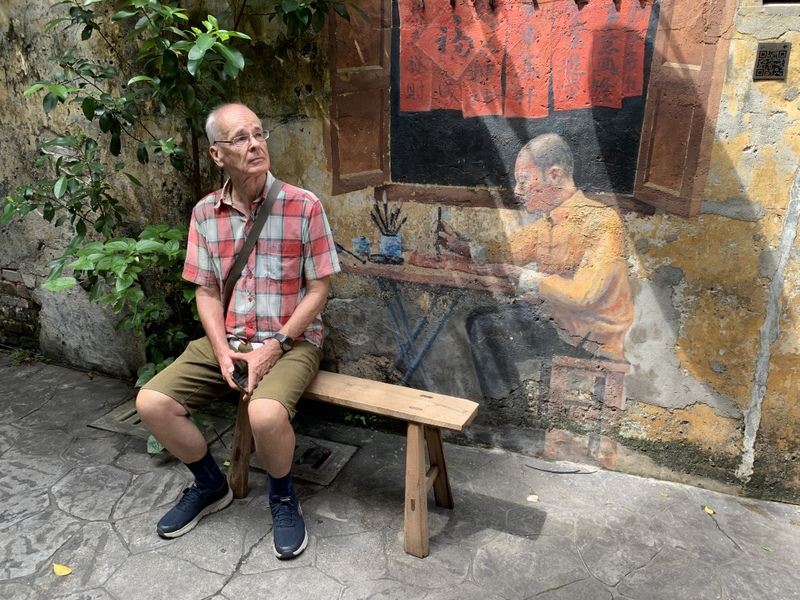
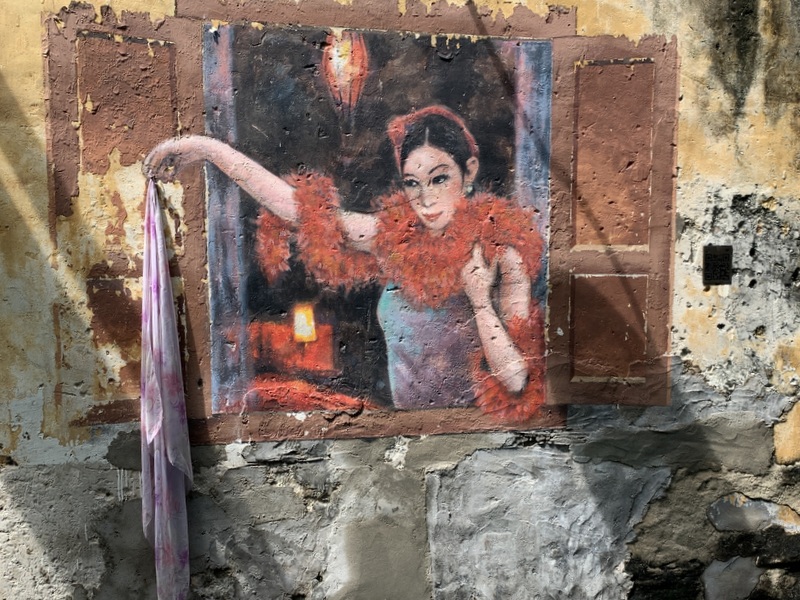
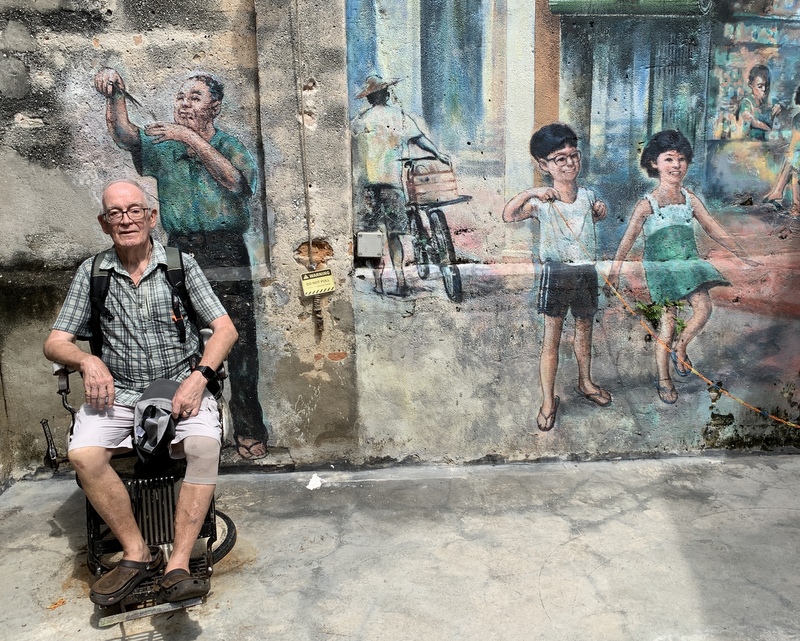
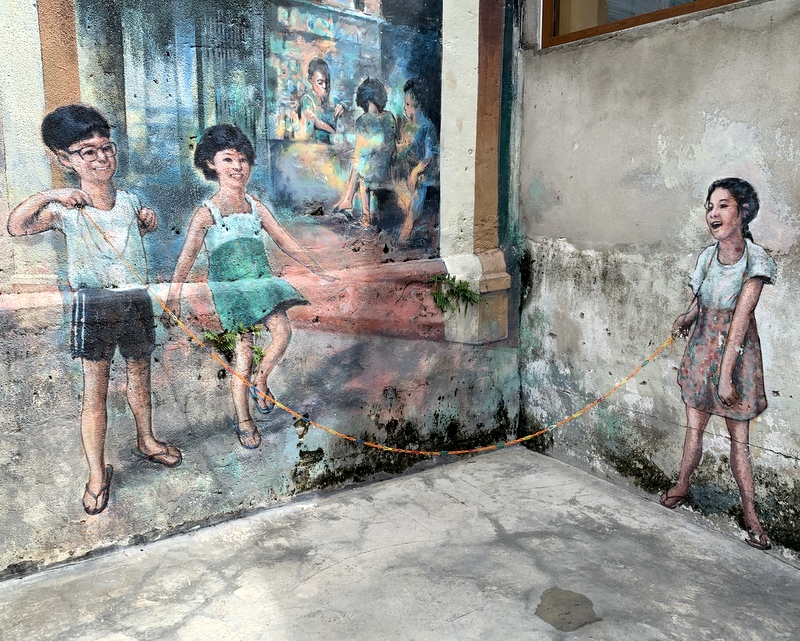
Lots of murals have been created during the last years, to liven up the neighborhood. Many different styles. Here is a collection, without comments
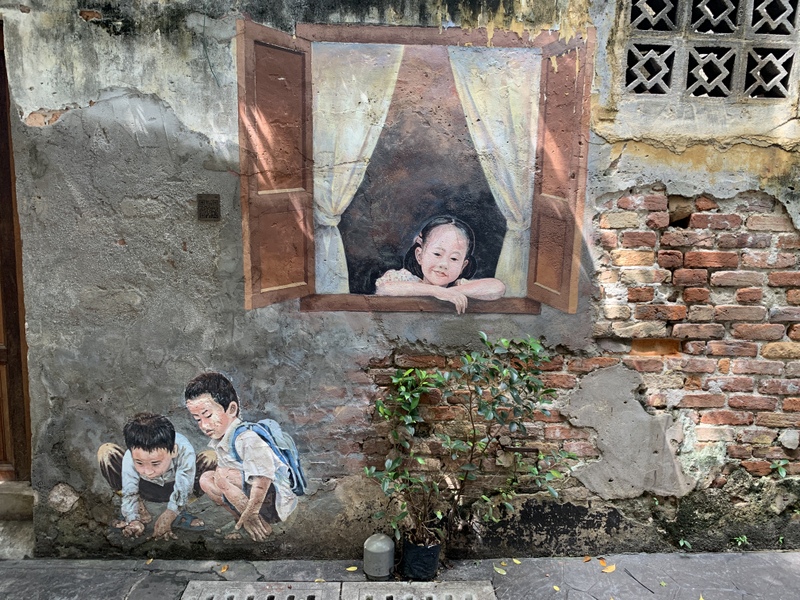
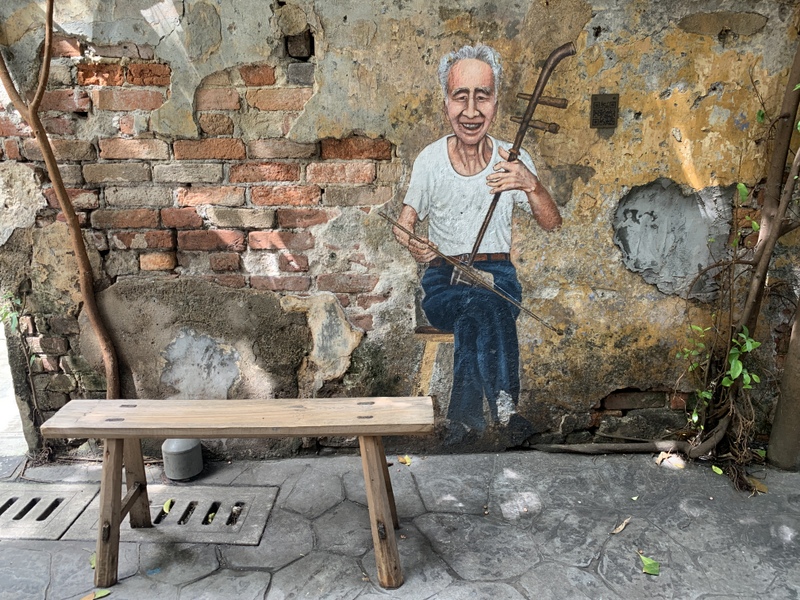
I like it when there are some 3D elements, like the barber chair and the kids jumping rope.
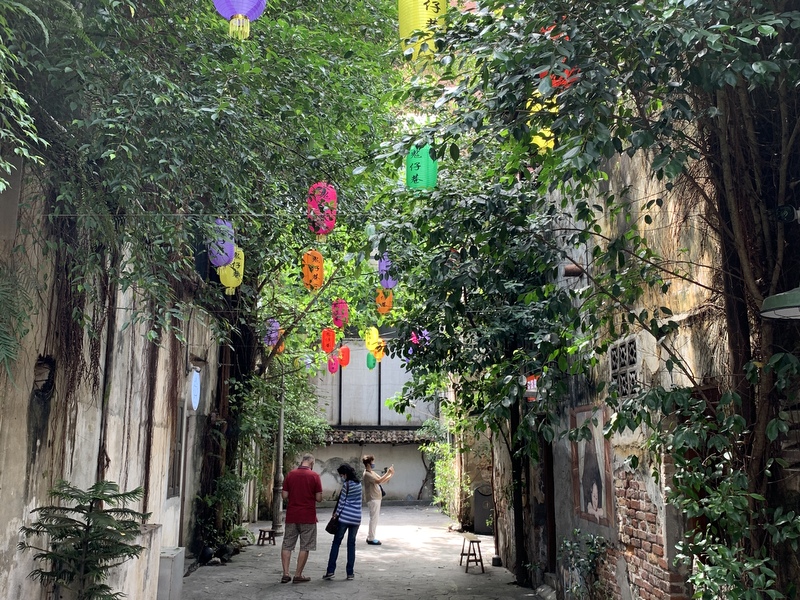
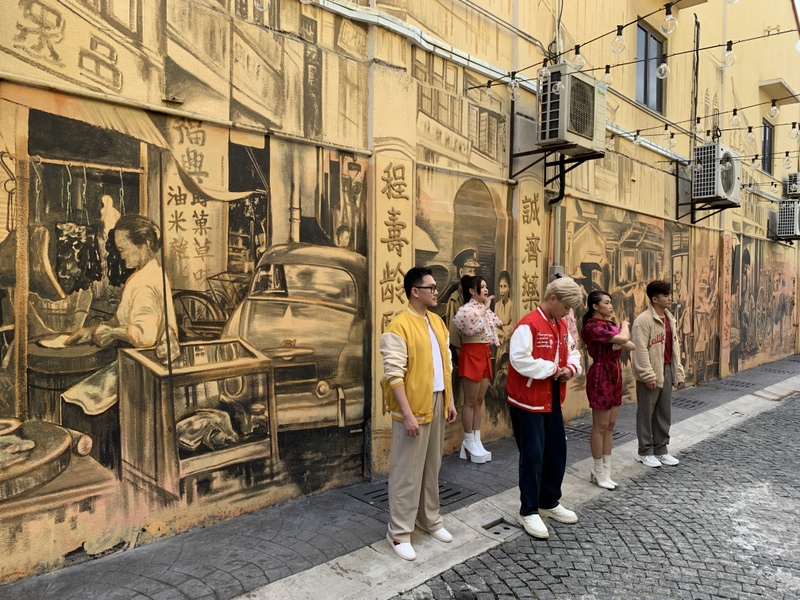
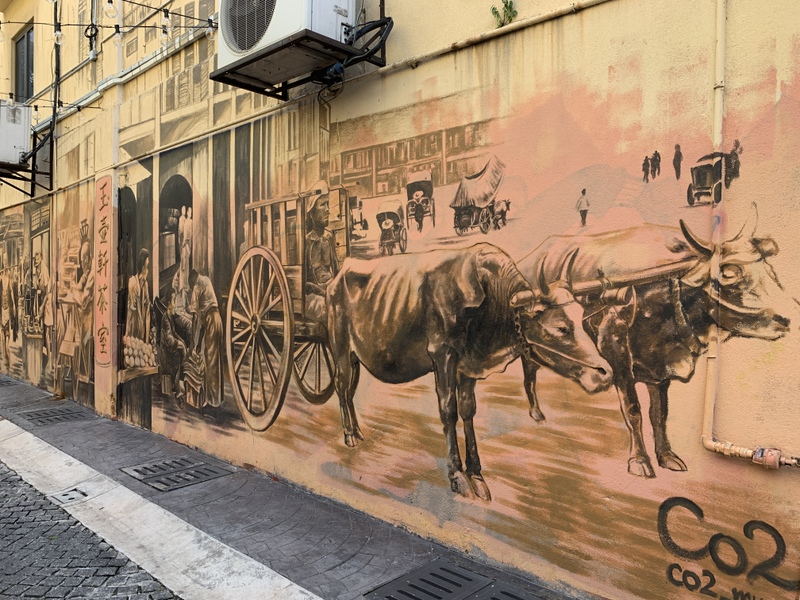
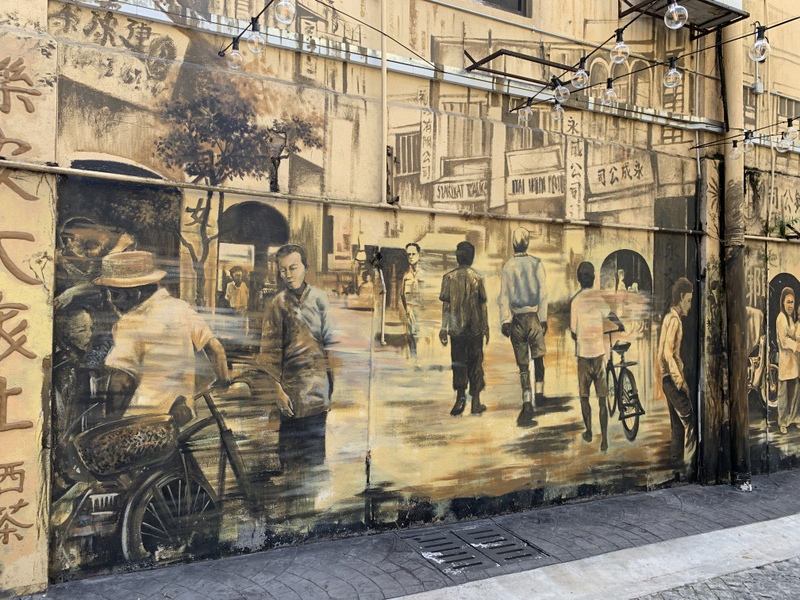
In another back lane the walls have been painted with scenes of KL’s past. It attracts tourists, but it is not really my favourite
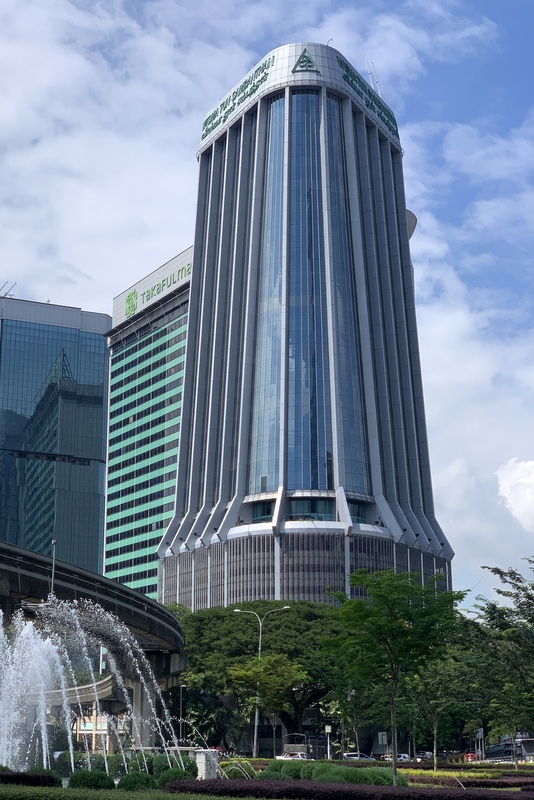
A nice contrast, skyscrapers around Chinatown. Two times Merdeka 118 (why did they not come up with a more interesting name?) and in the center a photo of the attractive Wisma Tun Sambanthan (1988)
We had to go back to our car, near Midvalley but didn’t want to walk all the way. Therefore we walked to the Maharaja Lela station of the Monorail and took it back to Brickfields
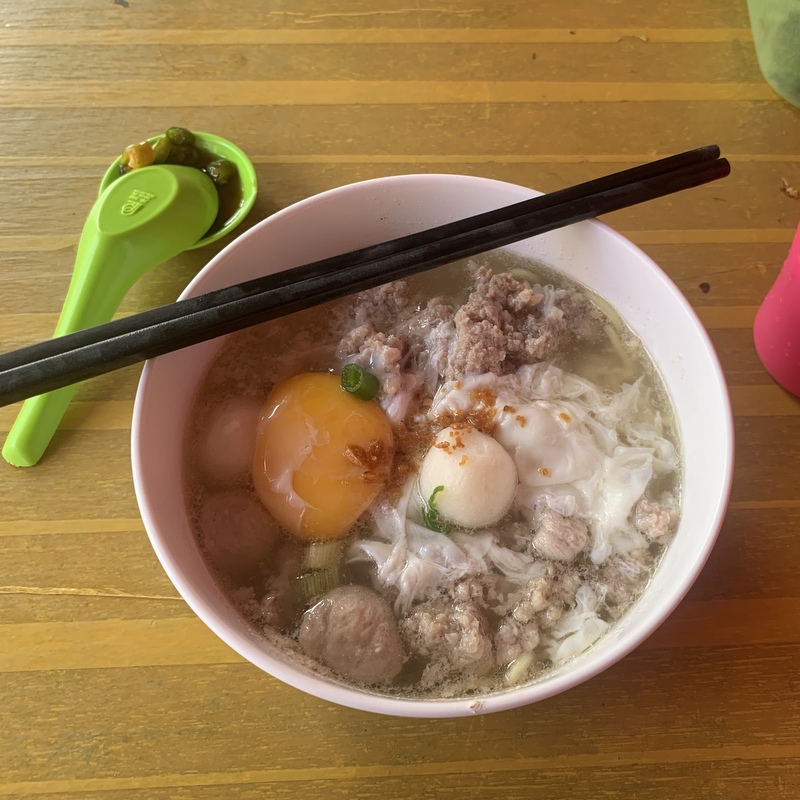
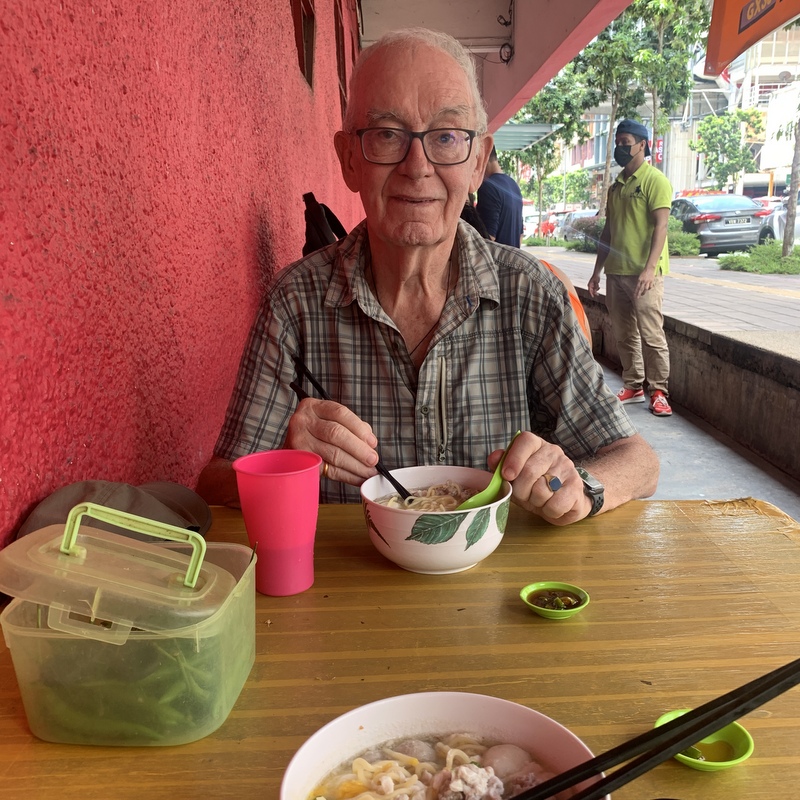
We were hungry, but it was too late for Thosai or Roti Chennai. Finally we found a Chinese pork noodle stall. Good quality food and not expensive.
After lunch we walked back the last part. Passing again the temple. Notice how huge the tree is. The last picture is at the empty building, near my car.
Here is the route we followed, the Monorail part in orange. It was an interesting walk, we are planning to walk one more time and then include the part near Masjid Jamek.
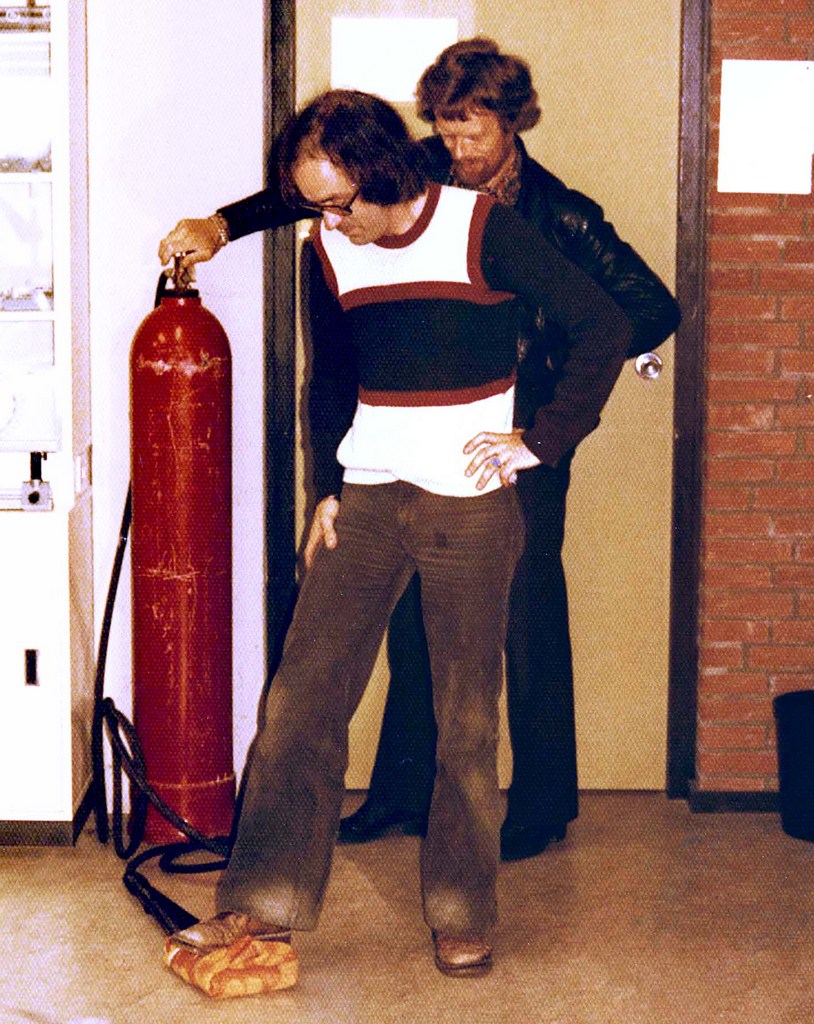
In 1976 I started as physics teacher. at a secondary school in Amstelveen. The physics department had an amanuensis (technical education assistant), Dick Vader, who was also an avid photographer. Of course we are both retired, but still in touch. Recently he sent me a collection of photos taken by him during my first decade of teaching and I can not resist the temptation to publish them in this blog.
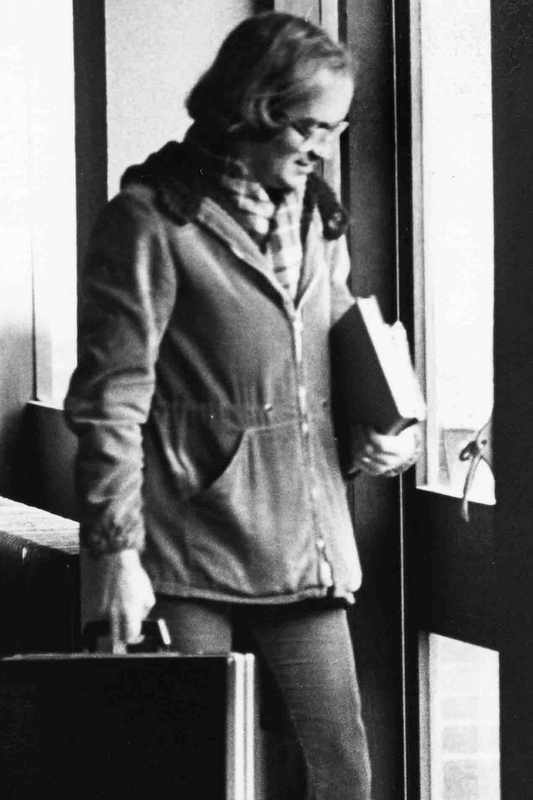
I was a hippie in those days, 32 year old when I started, with long hair, that was already beginning to thin 🙂
1976-1977, Dick Vader is assisting me to make dry ice, for use in physics experiments
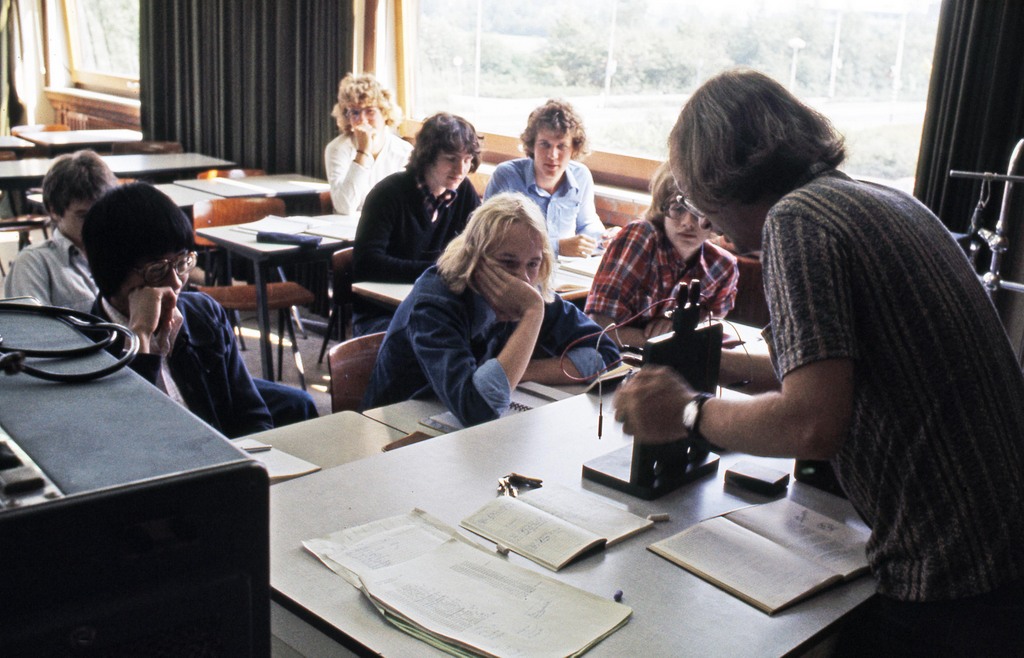
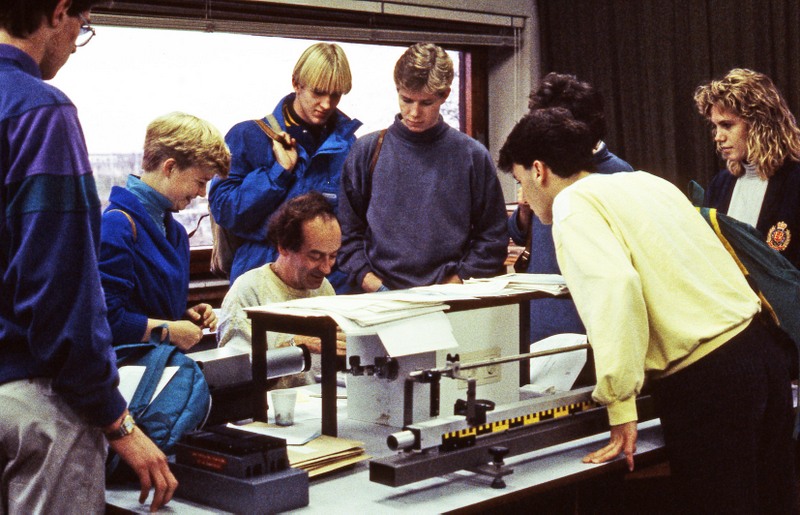
My first year was not easy. As a flower-power hippie, I found it difficult to exert authority. Fortunately I had a small group of final year students, where I could relax after hectic junior classes.
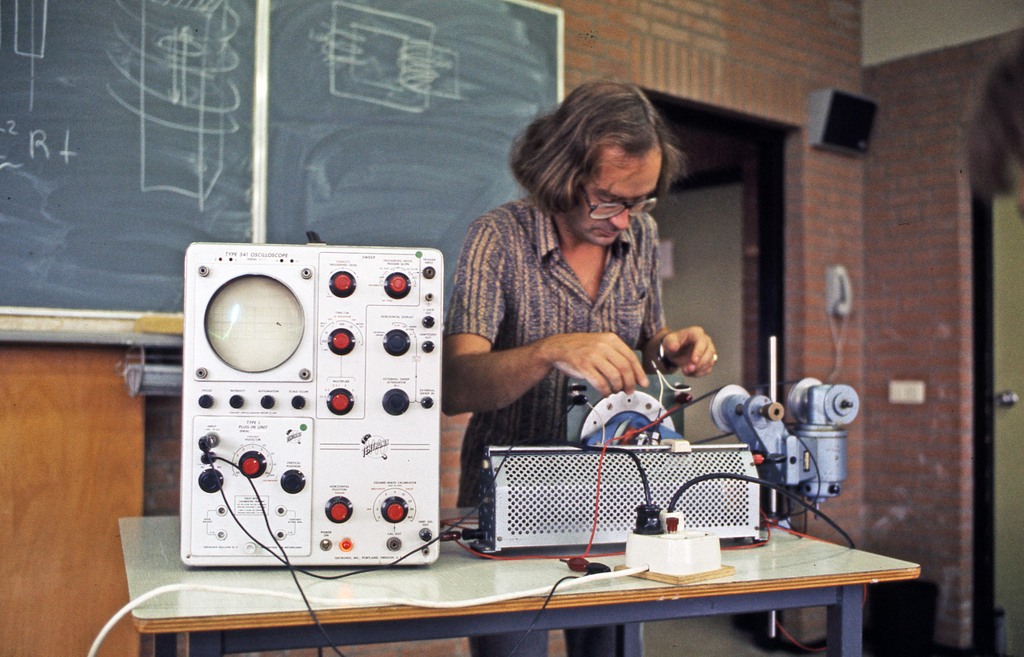
Preparing a demonstration of an alternating current motor
Look how they are watching the demonstration. A teacher’s dream.
I was still smoking pipe in those days. Not in the classroom of course, But no restrictions in the staff room and even the students were allowed to smoke in their own student canteen, and outside the school premises. Those were the days ;-). Soon I changed to cigarettes, to smoke pipe you need to be more relaxed
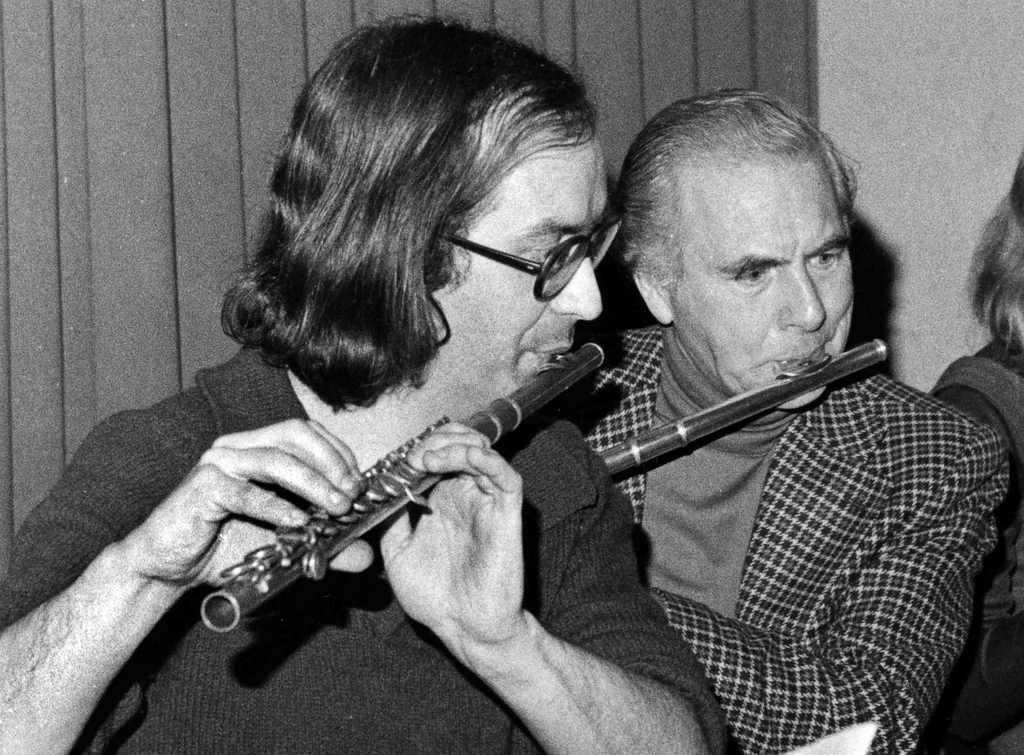
As I played the flute in those days and there was a school orchestra, of course I joined. Here with a French language teacher.
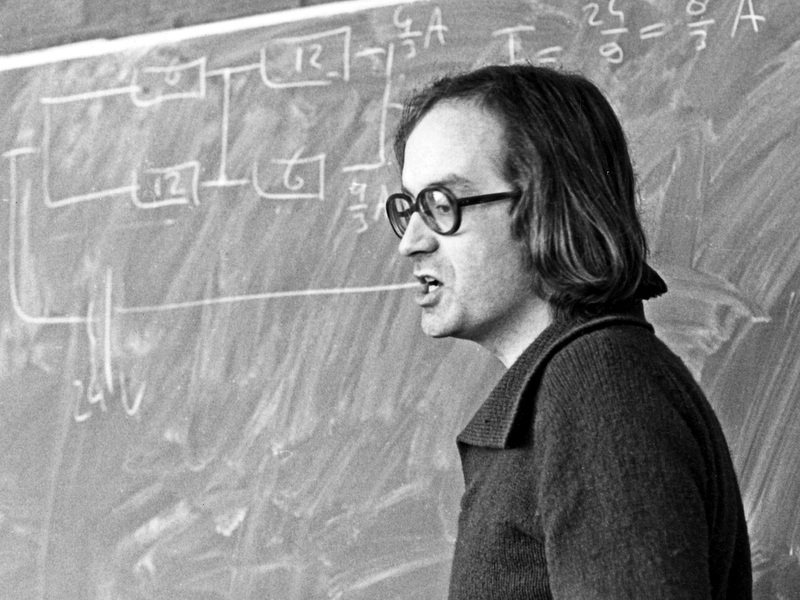
Still in my first year teaching. Explaining electrical circuits. I should have cleaned the blackboard better 😉 .
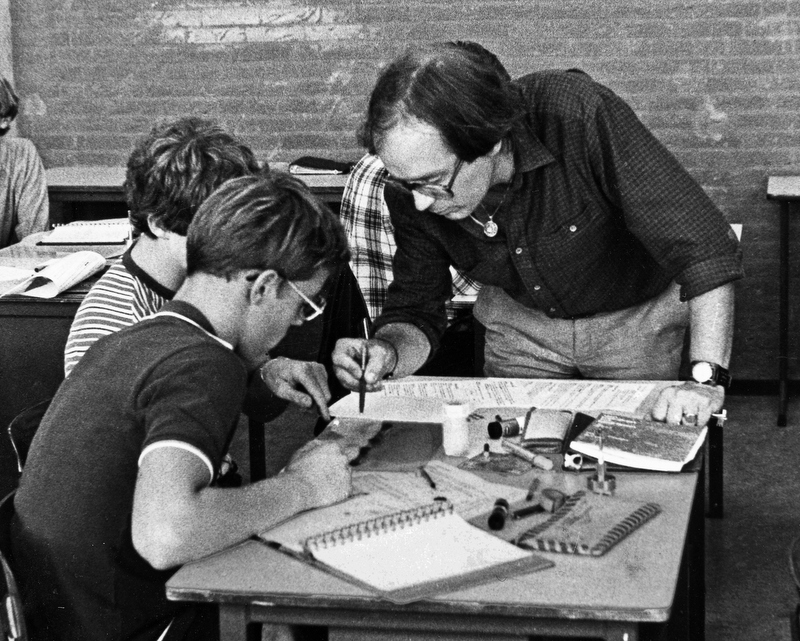
1980-1981 Helping my students with their homework.
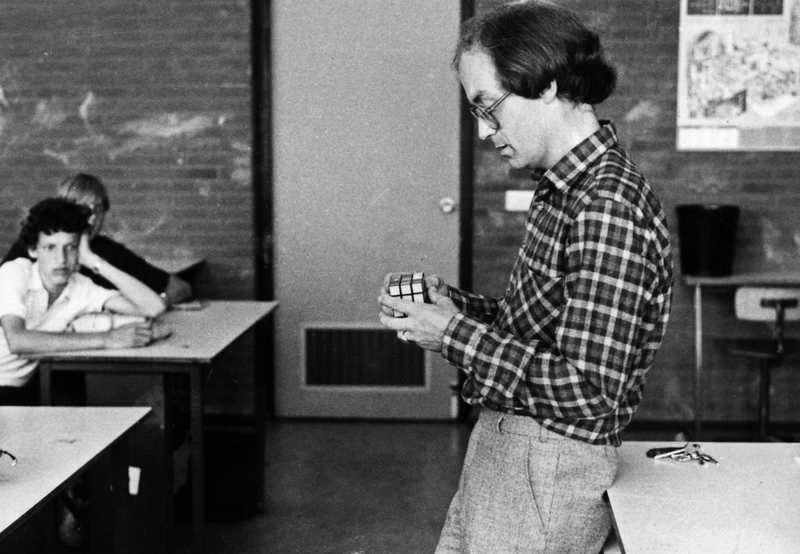
In 1980 Rubik’s Cube became a popular toy. Once I had a competition with my students who could solve it fastest. I remember that I was not bad, but I didn’t win.
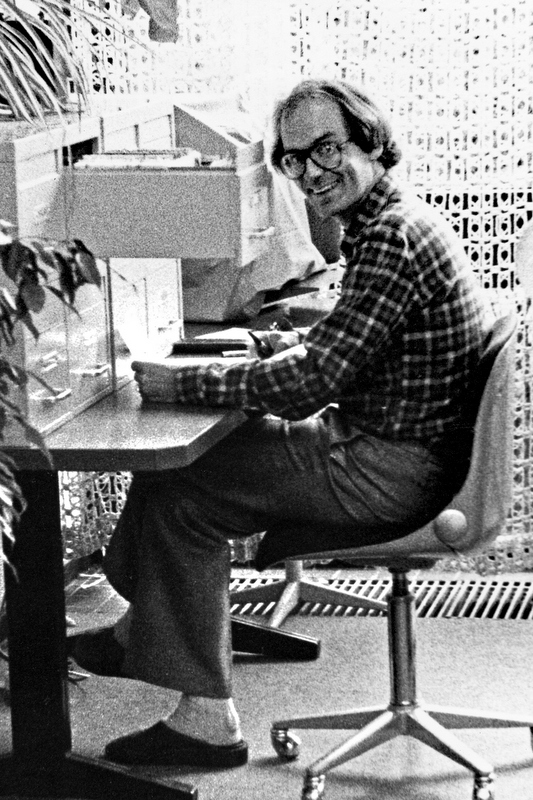
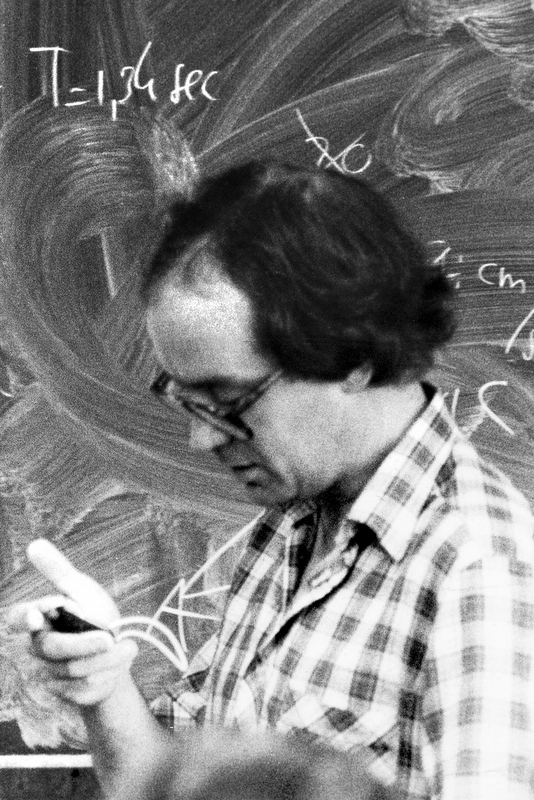
A teacher also has administrative duties (left). Not sure what I am doing in the right picture. Reading a stopwatch? My blackboard is still a mess. Pictures from around 1982
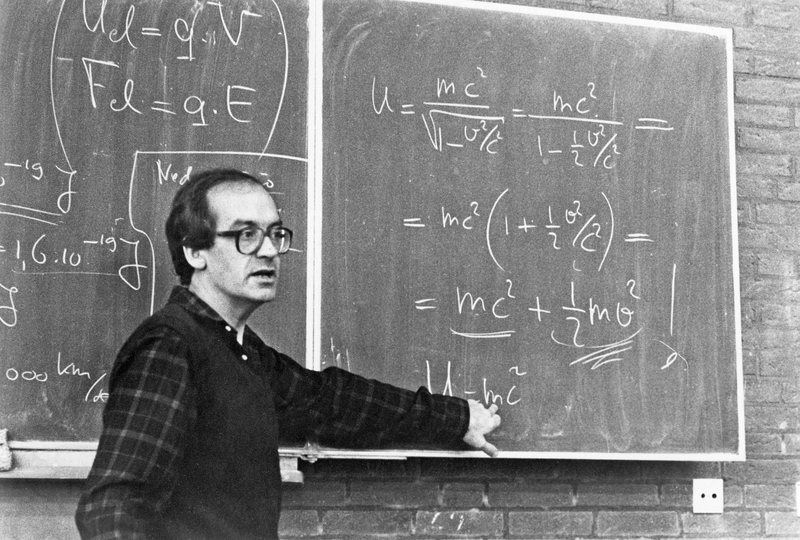
1983-1984 Here I explain a bit of Einstein’s Special Theory of Relativity. Not really part of the physics syllabus, but I liked to show my students a glimpse of what they would learn at university (if they decided to study physics 😉 ).
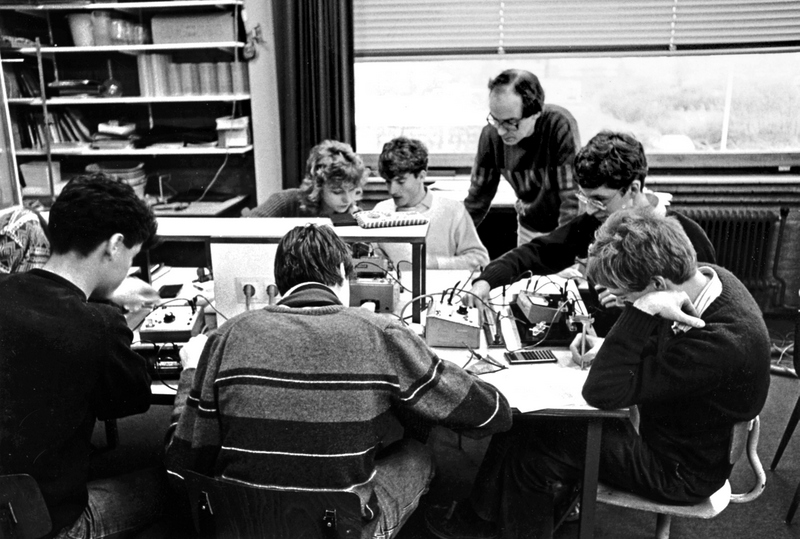
1983-1984 Students in their final year had to do experiments themselves and report about them.
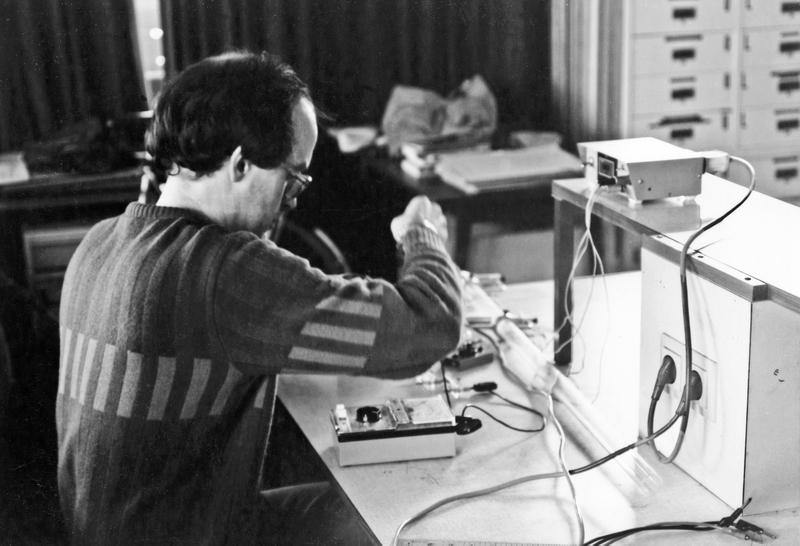
I had also to do experiments myself.
1987 I don’t remember what I am doing here and why my students are so interested to watch me.
This was the last photo , taken by Dick Vader. I continued teaching for another 15 years.
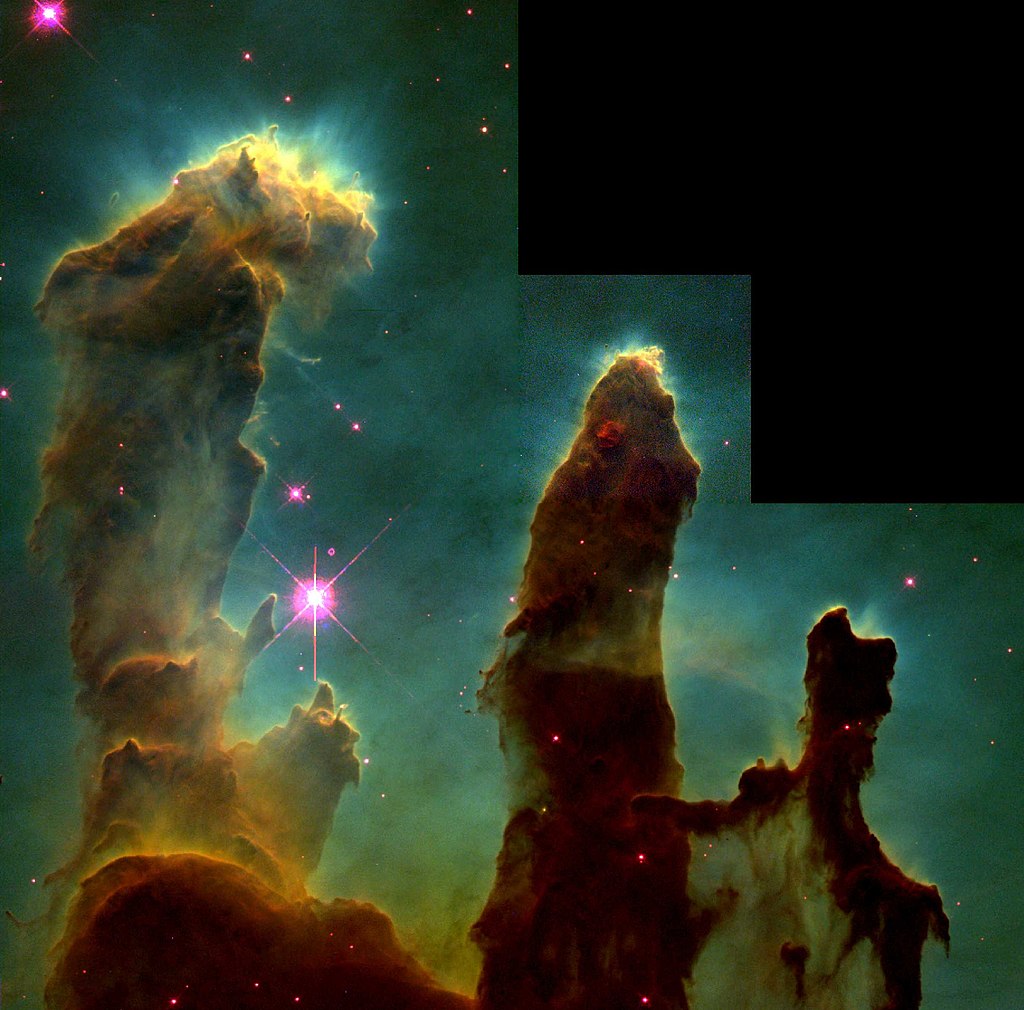
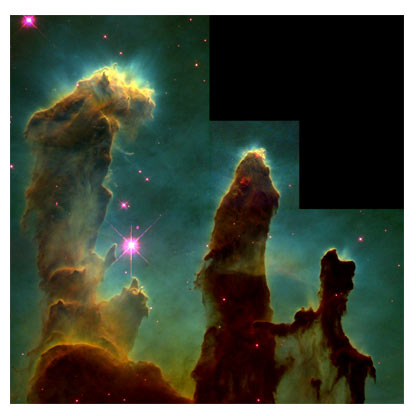
In 1995 NASA published this picture, taken by the Hubble Space Telescope. It shows a small part of the Eagle Nebula and became instantly famous. Because in the “pillars” stars are born, the picture got the name “Pillars of Creation”.
The Hubble Space Telescope was launched in 1990 and is still operating, with quite a few Space Shuttle service missions. To celebrate its 25th anniversary, a new picture of the Pillars of Creation was published in 2015. With a new camera installed, more details are visible,
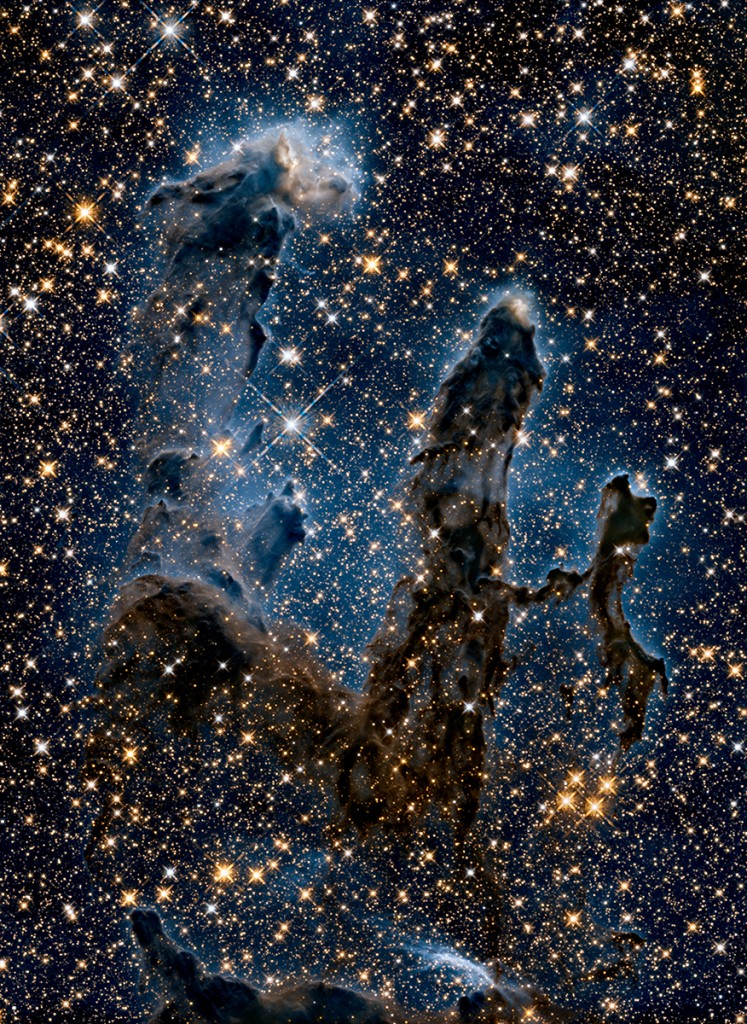
At the same time this picture was published, an infrared picture of the Pillars. Infrared light can travel more easily through dust and clouds and that is why now you see stars in the pillars, where young stars are still being formed. But I hope you wonder how this can be an infrared picture as infrared light is invisible light. The explanation will be the main part of this post.
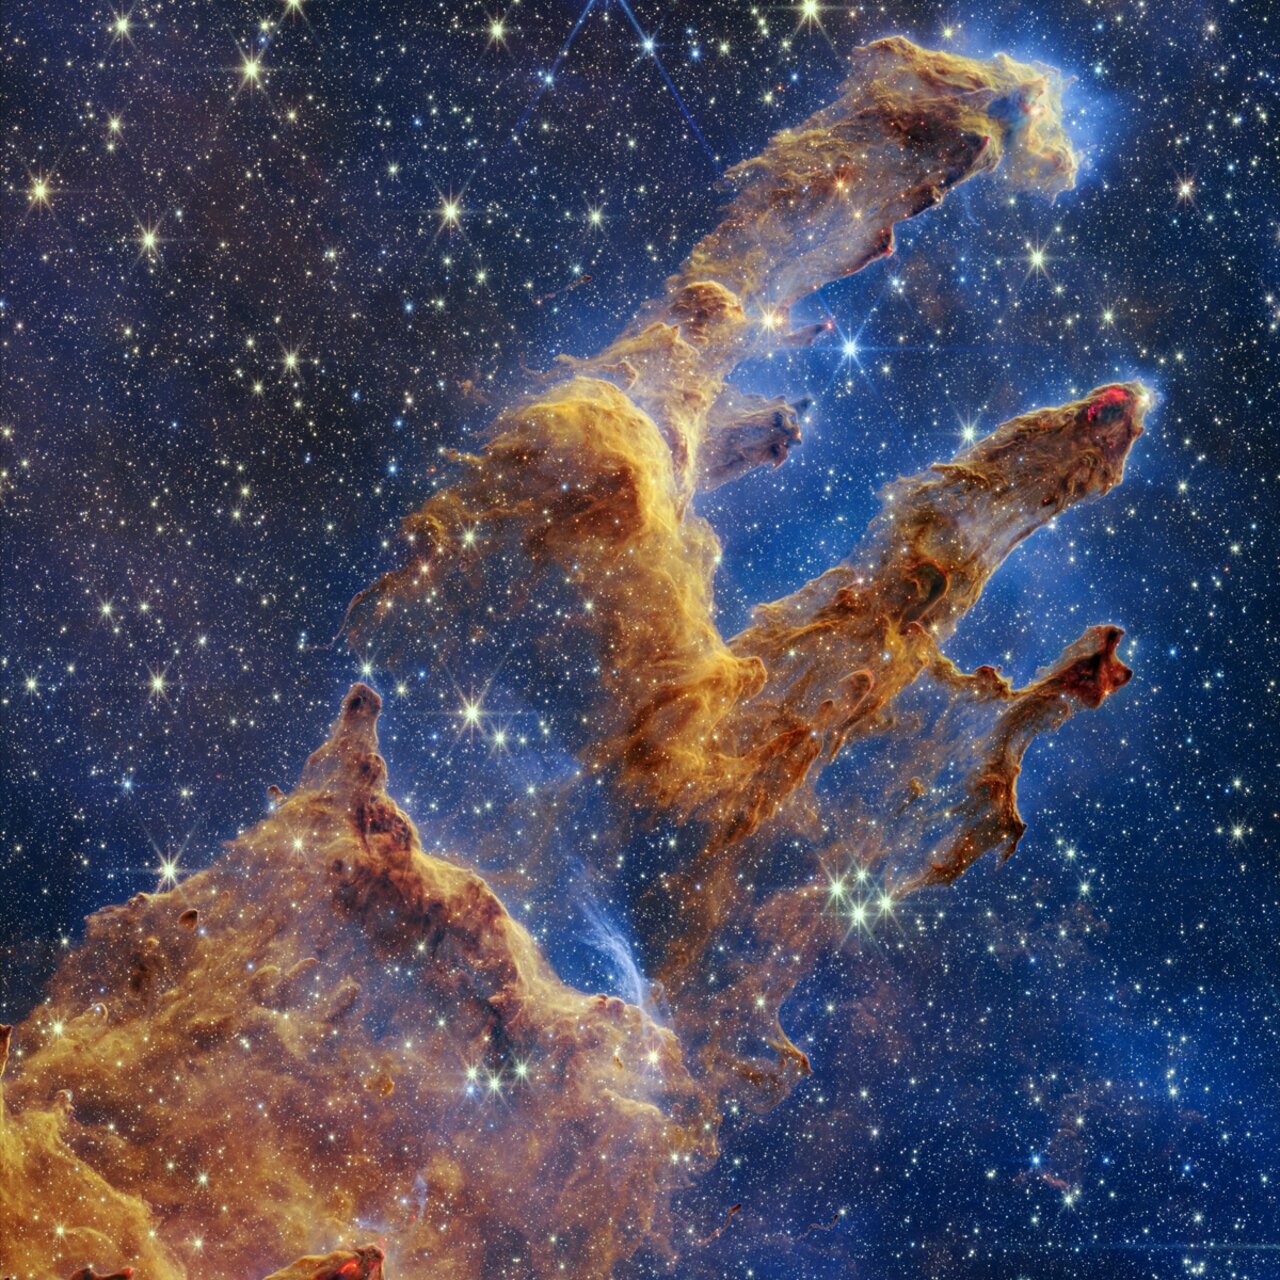
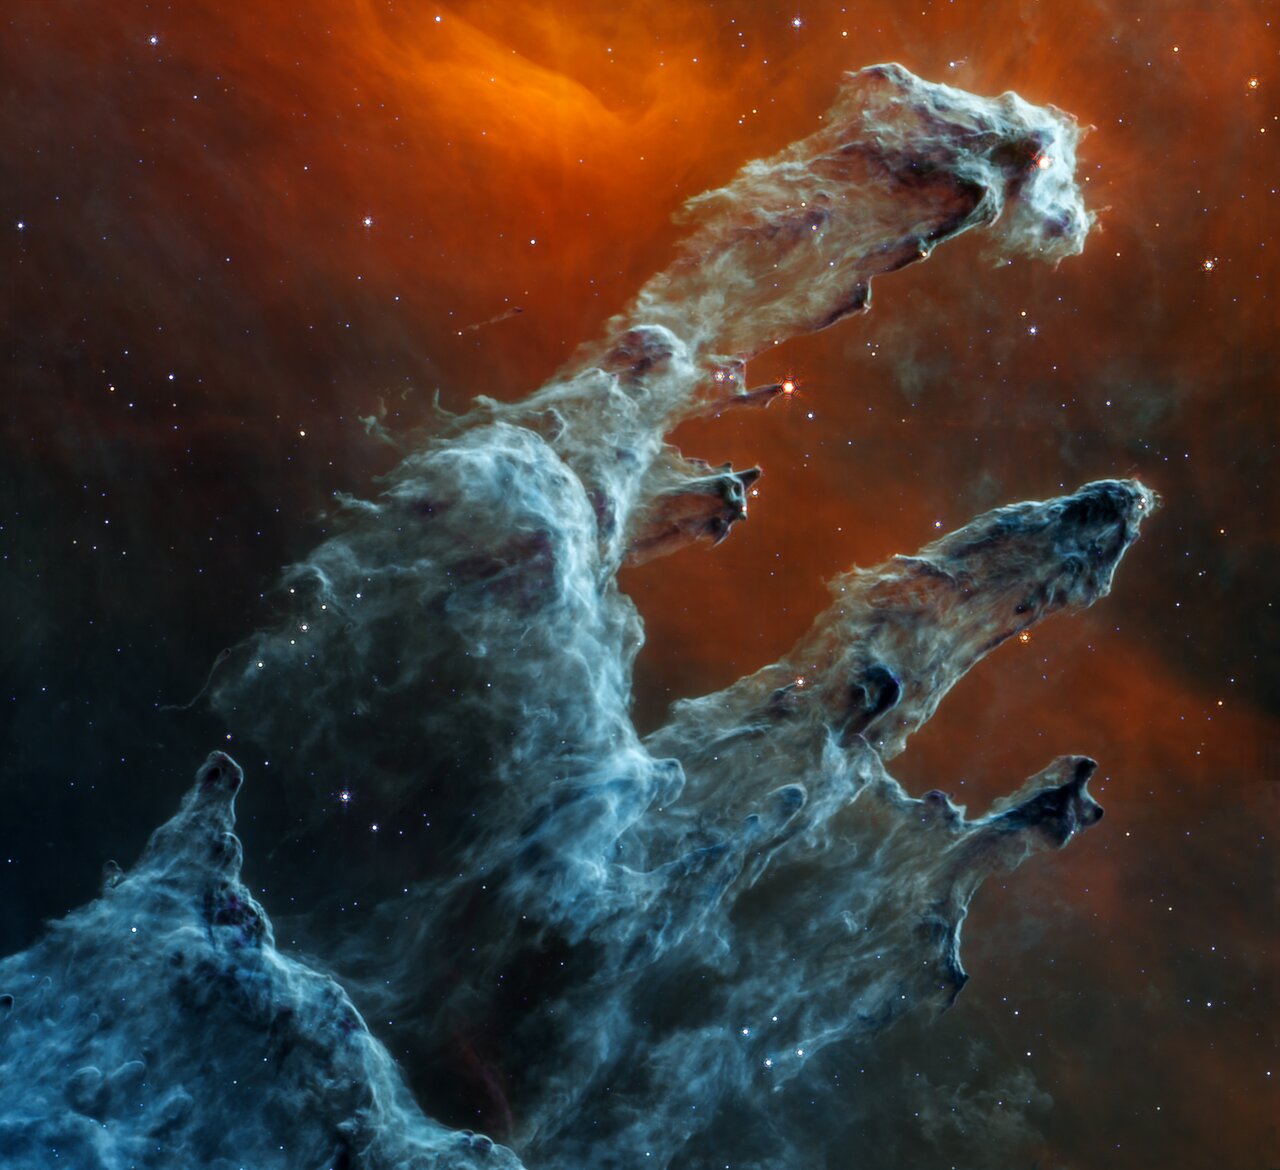
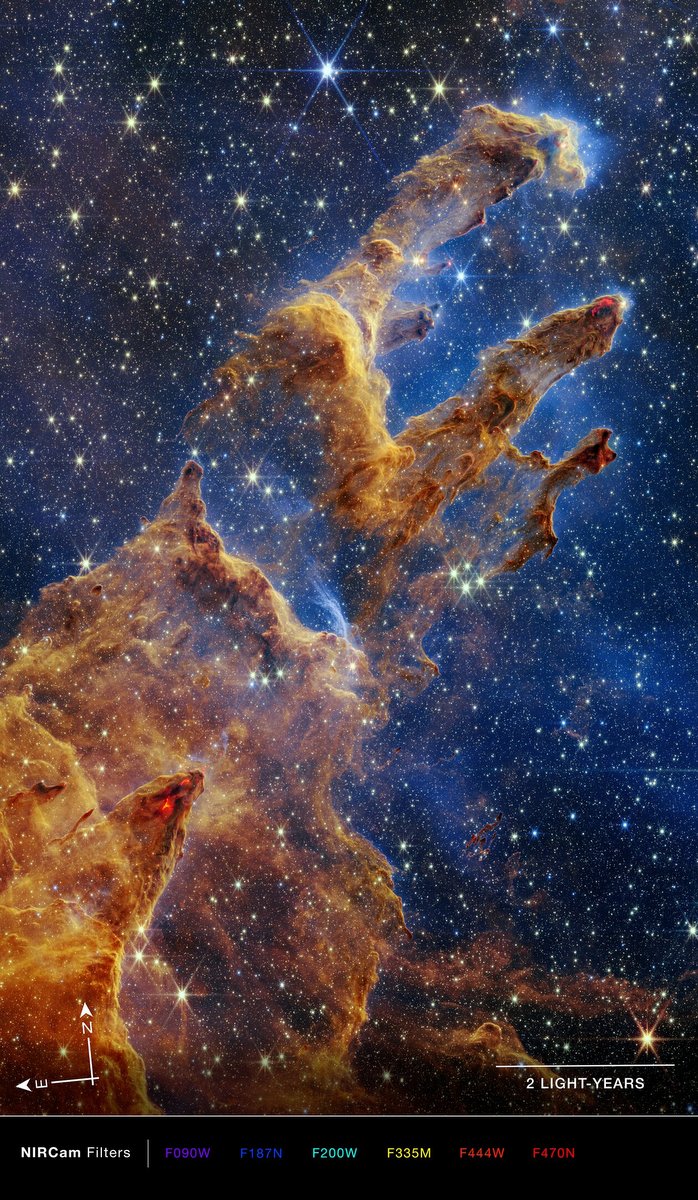
But first here are two pictures, recently taken by the James Webb Space Telescope. The JWST is an infrared telescope has and has two cameras on board to take pictures. The NIRCAM for near infrared light and the MIRI for medium infrared light. Here is the NIRCAM photo
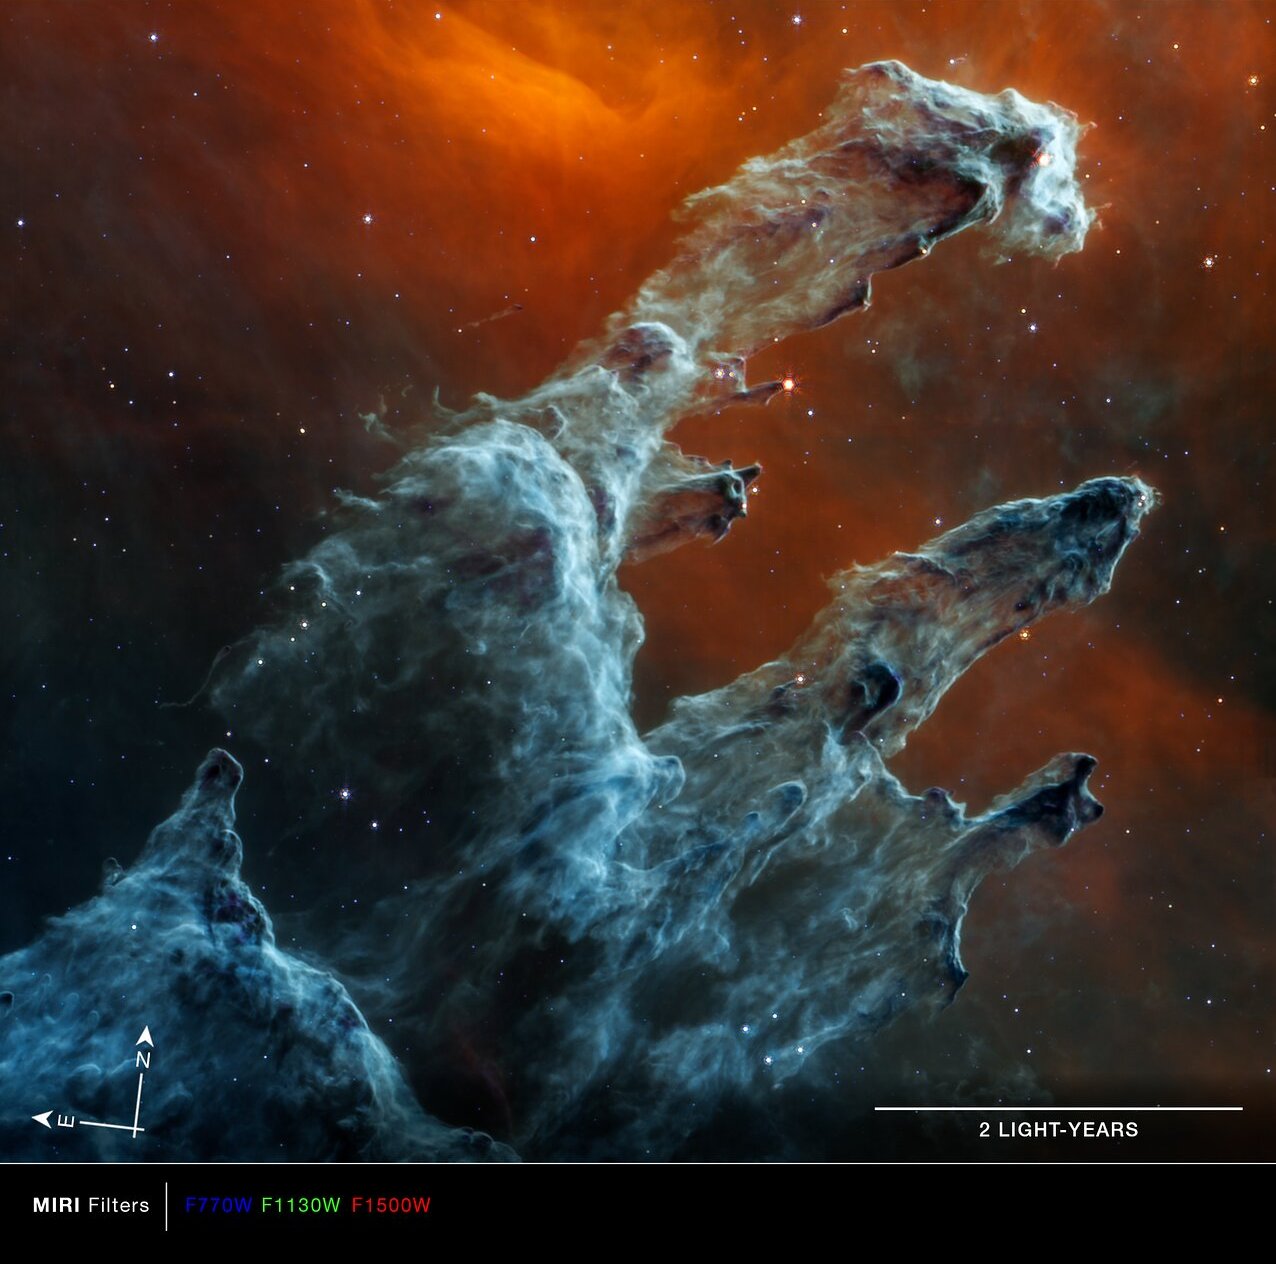
And here is the image from MIRI, Amazingly different. And again, how can these be infrared pictures’?
f
Time to give some explanation about the pictures and also about the Eagle Nebula, where the Pillars of Creation are located.
———————————————– About visible and invisible light
Light is an electromagnetic wave, as are microwaves, radio waves, X-rays etc, They all have different wavelengths. The wavelengths of visible light are often given in nanometers (nm), where 1 nm is 1/billionth meter. Or in micrometer (μm) where 1 μm = 1000 nm. The human eye is sensitive to wavelengths between ~380 and ~750 nanometer and sees the various wavelengths as different colors! The longest wavelengths are seen as red, the shortest as purple/blue with all the “rainbow” colors in between.. In this diagram the electromagnetic spectrum is shown. The infrared part can be subdivided in near infrared, mid infrared and far infrared
The Hubble telescope has two cameras onboard. Most of the iconic Hubble pictures have been taken by the Wide Field Camera. The present wide field camera (WFC3) can take photos in two channels, one for ultraviolet and visible light (UVIS) and the other one for near infrared (NIR), The range of UVIS is 200-1000 nm and of the NIR 800-1700 nm
The James Webb has two cameras, the NIRCAM for the near Infrared, range 600-5000 nm and the MIRI for the mid Iinfrared, range 5000-28000 nm (5 μm -28 μm).
Before we describe in some detail how digital cameras record images, it is useful to have a look at the way the human eye sees colors.
———————————————– How does the human eye see colors?
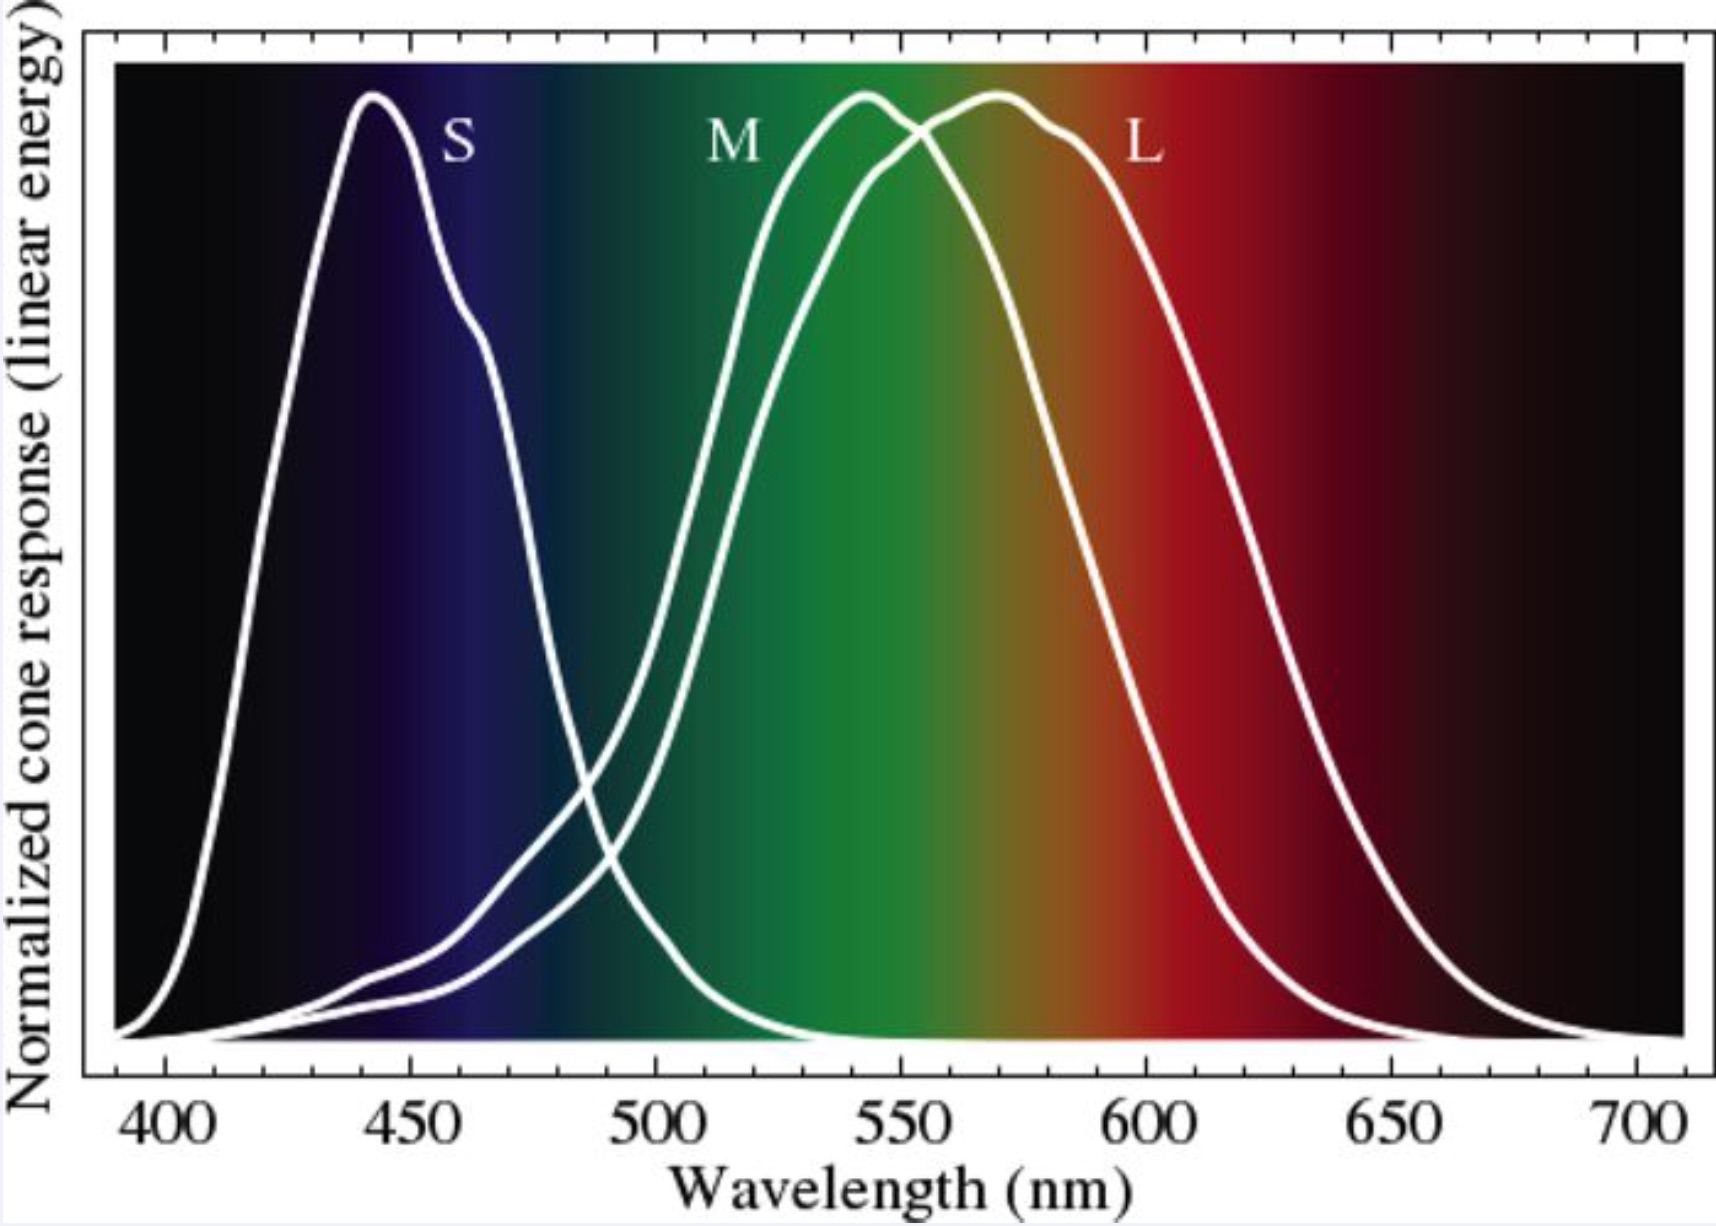
The retina of the human eye contains about 6 million nerve cells, called cones. These cones come in three different types, S, M and L, sensitive to various parts of the spectrum. The S type cones are sensitive to the blue part of the spectrum and are also often called Blue cones, In the same way the other two are often called Green and Red.
The brain is able to combine the response of these RGB- cells. For some people the M and/or L cone cells are not working properly. As a result they are colorblind.
———————————————– How does a digital camera record colors?
Digital cameras have sensors consisting of millions of individual pixels that record the intensity of the incoming light, basically in a gray scale (black and white). That these cameras can take color pictures is because in front of the sensor there is a color filter, consisting of a mosaic of millions of red, green and blue “pixels”. A so-called Bayer filter. See the diagram below. Taking a picture, means actually taking a red, green and blue picture at the same time, but these pictures are “incomplete”. By mathematical techniques (interpolation) the full color pictures are constructed.
.
Here is an example, where three images, in red, green and blue, when combined, give the full image in natural colors.
The sensors in space telescopes do not have these Bayer filters, they just record the image in gray scales. However, various filters can be placed in front of the sensor and multiple images can be taken of the same object. For example, the Hubble WFC3 camera has a huge choice of filters, 47 for the UVIS channel and 14 for the IR channel.
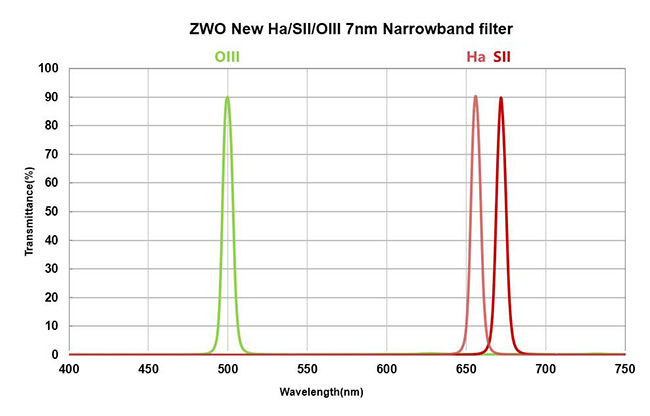
Why so many? Some filters are broadband, they pass a wide range of wavelengths. From a scientific point of vew the narrowband filters are interesting because they pass only the light emitted by specific elements. Here is one example, hydrogen (H) emits red light with a very specific wavelength of 656 nm. So one of the filters only passes wavelengths around that value and a picture taken with this filter shows the presence of hydrogen. Similar filters can be used to check the presence of oxygen (O), sulphur (S) etc.
———————————————– The Pillars of Creation pictures are “false-color” pictures!
On 1 April 1995, astrophysicists Jeff Hester and Paul Scowen published an article The Eagle Nebula, in which they showed a picture of the Pillars of Creation. If you think that was “just” a picture taken by the Hubble telescope, you are seriously mistaken. The PBS/NOVA website More than just a pretty picture explains in 19(!) webpages how the iconic photo was created. Very readable,
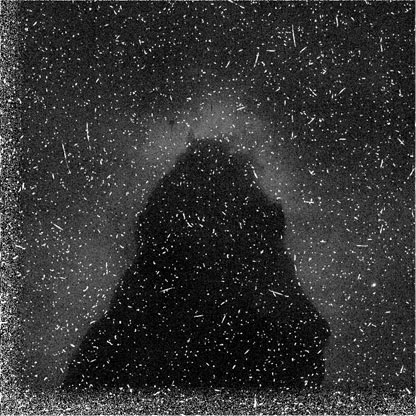
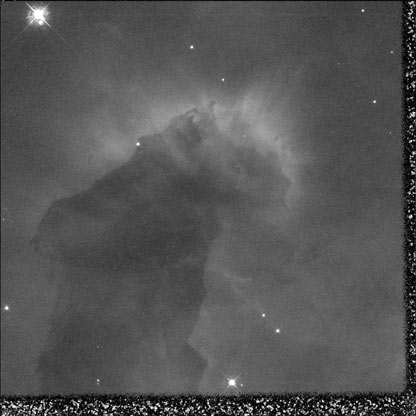
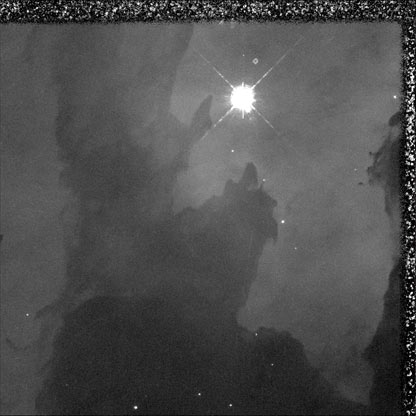
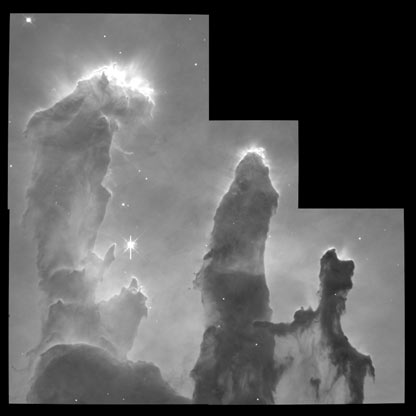
The WFC2 consisted actually of four cameras, each recording a quadrant. The top-right quadrant camera was slightly different, zooming to show more details. Resizing it to the format of the other three, causes the characteristic Hubble image with the “steps” in one corner. Here is the original image of this top right quadrant, in gray scales. What a mess. For an explanation how to clean this image, see the website. The second image shows the result of the various cleaning operations. What a difference !
We can do the same for the other quadrants.
top leftbottom leftbottom right
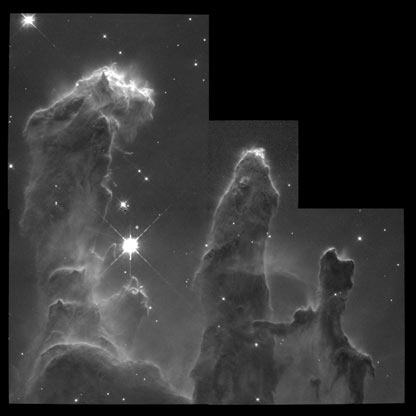
Now we can “glue” the four parts together. You can still see a bit the seams between the four images.
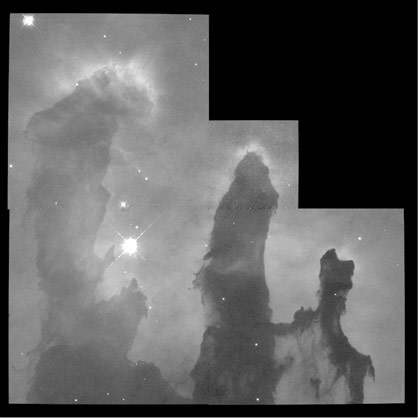
For this mage a filter was used that only let blue-green light through from (doubly ionised) Oxygen atoms (OIII). Two more filters were used to create images in the same way. One filter let only the reddish light from Hydrogen atoms through (Ha), the other one selected reddish(!) light from ionised Sulphur atoms SII). Three narrowband filters, two of them in the same color range.
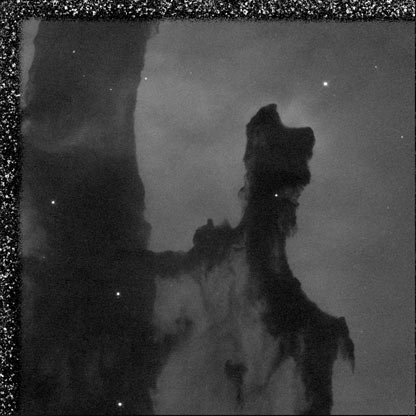
Here are the three filtered images
SII filterHa filterOIII filter
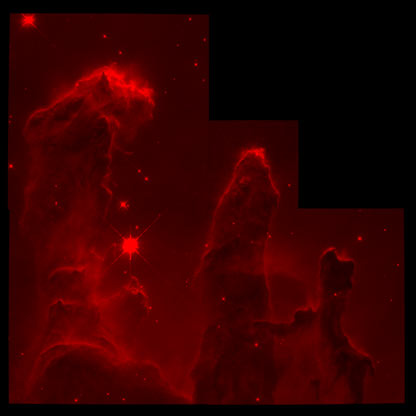
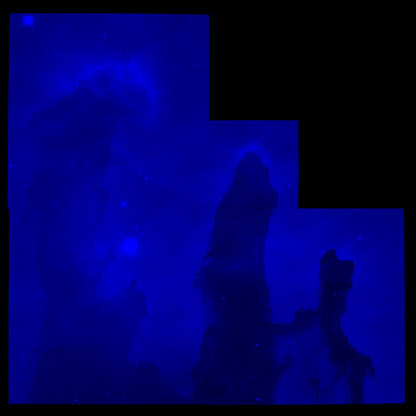
You might expect that the next step would be to give these image’s color corresponding to the filter used for each of them. The Ha and SII reddish and the OIII one greenish. But that is NOT what Hester and Scowen did. They assigned the RGB colors to the three images. Blue to the OIII image, Green tot the Ha image and Red to the SII image.
SIIHaOIII
Final step is to combine them: the Pillars of Creation.
The main reason to assign “false colors” to the pictures is to enhance the contrast and to see how the various elements are distributed. Almost all Hubble photos are false color (also called pseudo color). Using the three narrowband filters for S, H and O and assigning them to RGB is so common that it is often called the Hubble Palette. Doing a Google image search for Hubble Palette gives a huge number of hits. Here is a part.
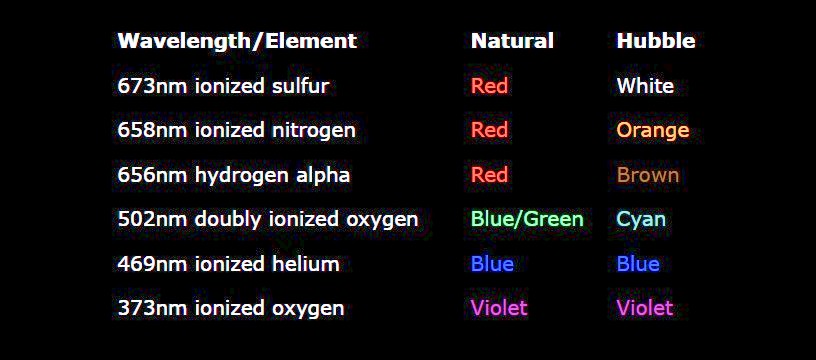
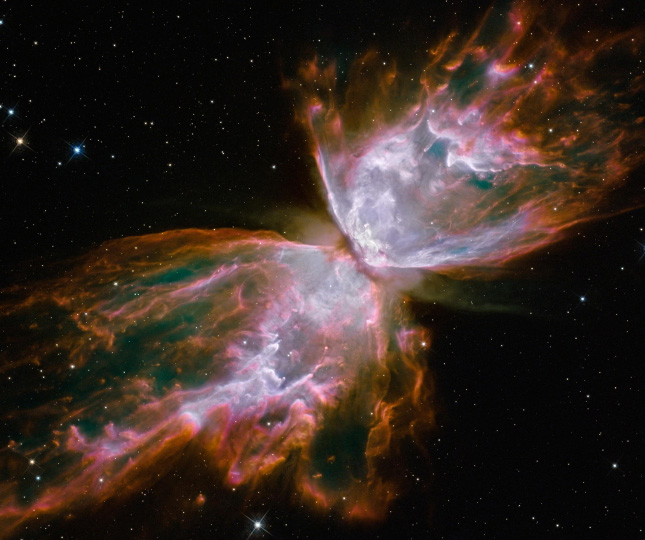
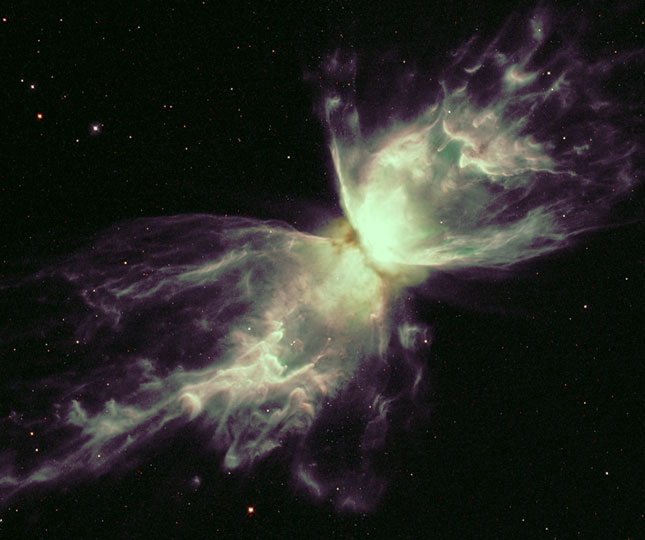
Other combinations of narrowband filters are also used. Here is an example where 6 filters have been used for the Butterfly Nebula. Besides SII, Ha and OIII, also ionised nitrogen, helium and oxygen. In the table the natural colors are given and also the colors assigned in the Hubble palette.
An American astrophotographer got curious how this nebula would look in the natural colors. Here are two images’, left the false color one and right the picture in natural colors. It is clear that the artificial image reveals many more details
It must be clear now that while with the Hubble telescope you have a choice to use false colors, with the JWST there is no other option, as infrared light is not visible. Here are the filters used for the MIRI camera. The colors suggested for the various infrared ranges are not significant, just to guide the eye.
For the MIRI picture three filters were used, F770W, F1130W and F1500W. In the above diagram I have marked them. For this picture they are assigned Blue, Green and Red respectively.
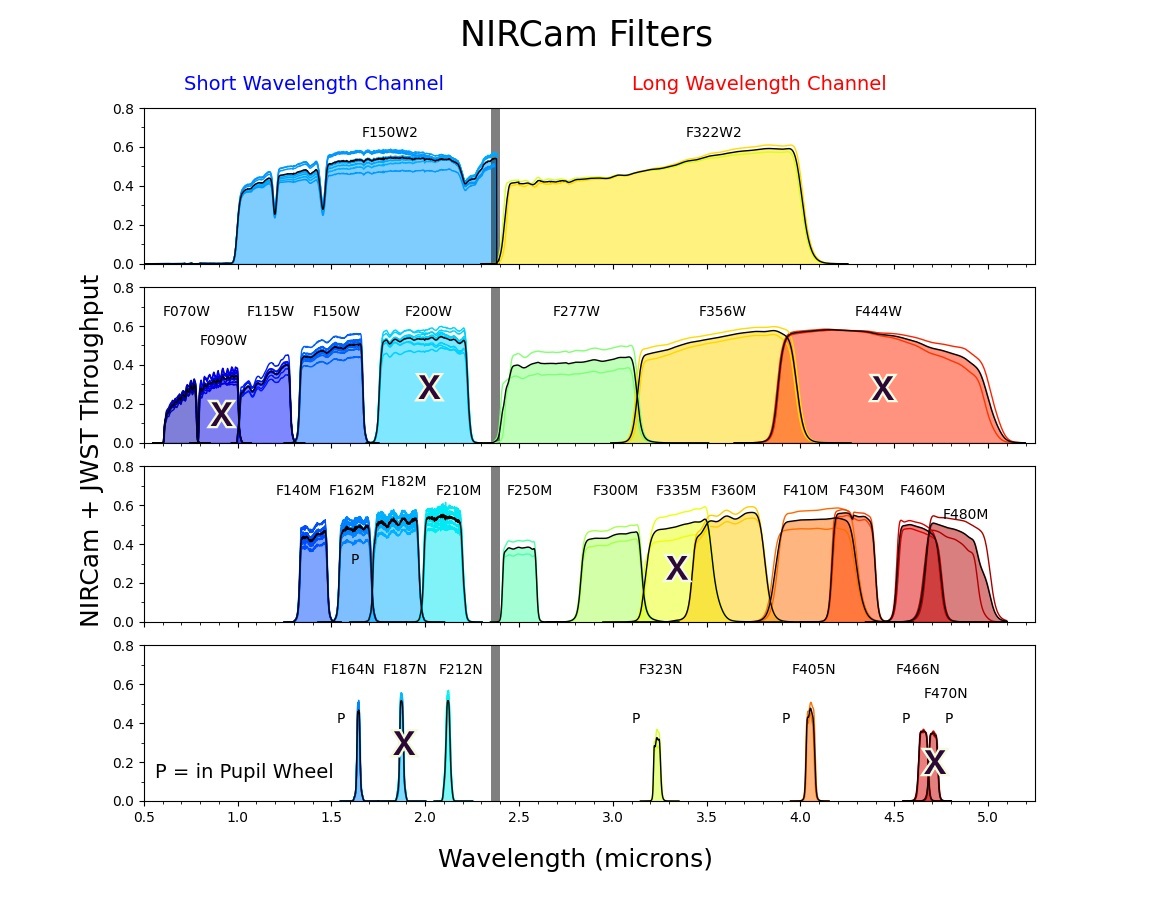
The NIRCam camera has many more filters, broadband, narrowband etc.
For the NIRCam picture 6 filters have been used, marked in the diagram above.
t
I have read somewhere that creating these images should be considered as art and I agree.
———————————————– The Eagle Nebula
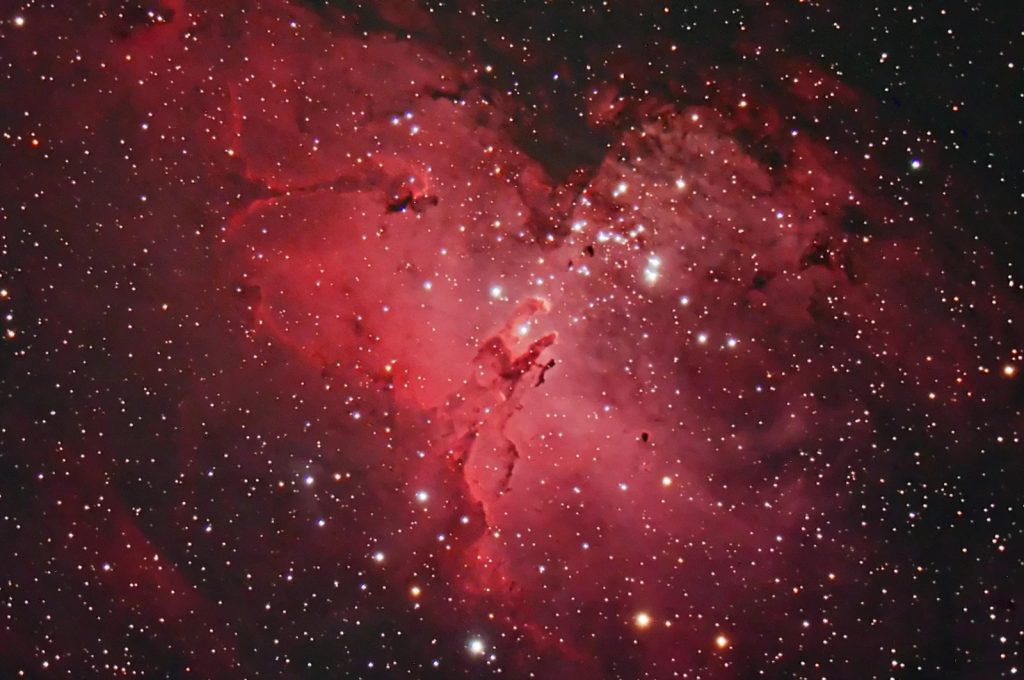
Finally a few remarks about the Eagle Nebula. When massive stars die, they can “explode” as a supernova, erupting their remnants into space. In these clouds of dust and various elements, new stars can be formed. The Eagle Nebula is such a cloud, here is a picture taken by an astrophotographer, using a telescope and a DSLR camera! Many of the bright spots in this picture are young stars already formed in the cloud. These stars are so hot that they emit UV light and even X-rays. This radiation can has enough energy to ionize the cloud. Such a cloud is called an emission nebula. The dominant reddish color is caused by hydrogen
The Eagle nebula is located about 7000 lightyear away and is huge, roughly 70 x 55 lightyear. It is a young nebula, estimated age is 5.5 million year. It is also a temporary event, the forming of new stars still continues and the radiation those stars will erode the nebula.
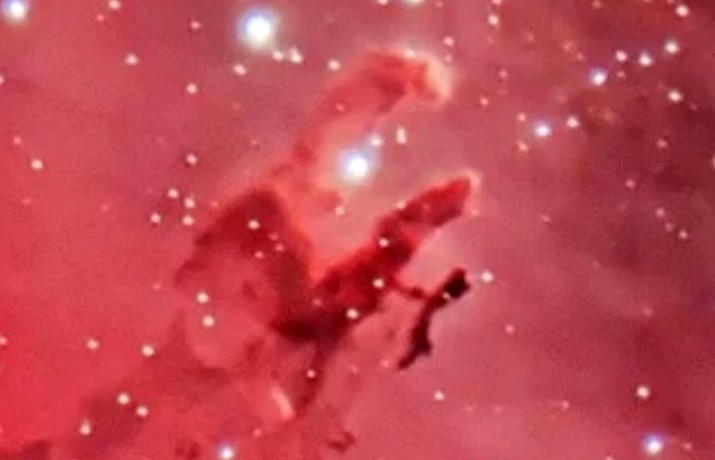
In the center of the above image, you can see the pillars of creation.Here is a dteail. Comapre it with the images of Hubble and Webb. Even these pillars are huge, the logext one is about 4 lightyear long.
A final remark. From the Hubble and Webb picture you might think that the pillars are almost like rock, impenetrable. But this is not true at all. The density of nebulas varies between 100 – 1 million particles per cubic cm. A high vacuum on earth still has considerably more particles per cubic cm. It is just the huge size that makes the pillars look like solid.